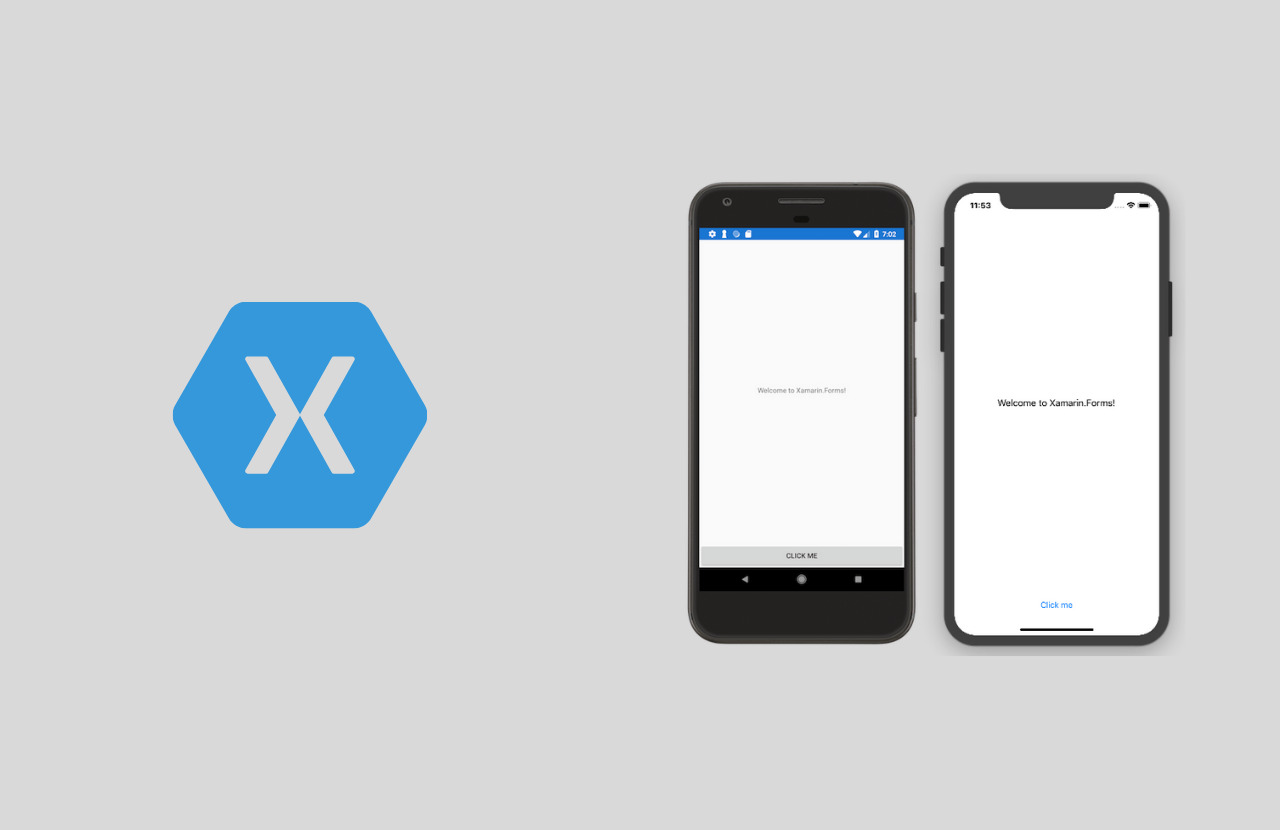
Xamarin: Your Go-To Android Resource

Android Studio
xamarin-your-go-to-android-resource
Source: Smartbear.com

Introduction to Xamarin for Android

What is Xamarin?

Xamarin is a powerful tool for building mobile apps. It lets developers create apps for both Android and iOS using a single codebase. This means you can write your code once and run it on multiple platforms, saving time and effort. Xamarin uses C# and .NET, which are popular programming languages, making it easier for developers familiar with these languages to get started.

Why Choose Xamarin for Android Development?

Choosing Xamarin for Android development comes with several perks. First, it allows for code sharing across different platforms, which means you don't have to write separate code for Android and iOS. This can significantly speed up the development process. Second, Xamarin provides native performance and access to native APIs, so your app can take full advantage of the device's features. Lastly, it has a strong community and plenty of resources, making it easier to find help and tutorials when you need them.

Current State of Xamarin Android

The current state of Xamarin Android is quite robust, but it's also evolving. Microsoft, which owns Xamarin, is gradually integrating it into the broader .NET ecosystem. This means more updates and improvements are on the horizon. However, some older features might get deprecated, so it's essential to stay updated with the latest changes. Keeping an eye on official announcements can help you adapt to these updates smoothly.

Setting Up Xamarin for Android Development

Installation and Setup

Getting started with Xamarin involves a few steps. First, you'll need to install Visual Studio, which is the integrated development environment (IDE) for Xamarin. During the installation, make sure to select the Mobile development with .NET workload. Once installed, you might need to set up the Android SDK and Emulator. Visual Studio usually guides you through these steps, making the process straightforward.

Creating Your First Xamarin Android Project

Creating your first Xamarin Android project is exciting! Open Visual Studio and select Create a new project. Choose the Android App (Xamarin) template and follow the prompts to name your project and select its location. Once the project is created, you'll see a default template with some basic files and folders. This template includes everything you need to start building your app.

Understanding Xamarin.Android Project Structure

The Xamarin.Android project structure might look a bit complex at first, but it's organized logically. You'll find folders like Resources, which holds your images, layouts, and strings. The MainActivity.cs file is where your app's main logic starts. There's also a Properties folder containing important configuration files. Understanding this structure helps you know where to put your code and resources, making development smoother.

Working with Android Resources in Xamarin

What are Android Resources?

Android resources are essential components in app development. They include images, layouts, strings, and other assets that help define the look and feel of an app. These resources are stored in the res directory and are referenced in the code to create a dynamic and visually appealing user interface. By separating resources from the code, developers can easily manage and update them without altering the core logic of the app.

Managing Resource Files

Managing resource files in Xamarin.Android involves organizing them into specific folders within the res directory. Here’s a quick rundown of common resource types and their respective folders:

  • Drawable: Stores images and graphic files.
  • Layout: Contains XML files that define the UI layout.
  • Values: Holds XML files for strings, colors, dimensions, and styles.
  • Menu: Contains XML files for defining menus.

To add a resource file:

  1. Right-click the Resources folder in the Solution Explorer.
  2. Select Add > New Item.
  3. Choose the appropriate resource type (e.g., Android Layout, Android Drawable).
  4. Name your file and click Add.

Resource.designer.cs File

The Resource.designer.cs file is automatically generated by Xamarin.Android. It maps the resource IDs to the corresponding resources in the res directory. This file allows developers to reference resources in the code using a strongly-typed approach.

For example, to reference a string resource:

csharp
string appName = Resources.GetString(Resource.String.app_name);

This file should not be manually edited, as it is regenerated each time the project is built.

Advanced Resource Management

Customizing Resource Generation

Customizing resource generation in Xamarin.Android can help tailor the build process to specific needs. This involves modifying the Build Action property of resource files. Common build actions include:

  • AndroidResource: Default for most resources.
  • Content: For files that should be included in the APK but not processed as resources.
  • None: Excludes the file from the build.

To change the build action:

  1. Right-click the resource file.
  2. Select Properties.
  3. Change the Build Action to the desired value.

Handling Resource Conflicts

Resource conflicts occur when multiple resources have the same name. To avoid these issues:

  • Use unique names for resources.
  • Organize resources into subfolders within the res directory.
  • Prefix resource names with a module or feature identifier.

If a conflict arises, the build process will typically provide an error message indicating the conflicting resources, allowing for quick resolution.

Using Android Asset Studio

Android Asset Studio is a handy tool for generating icons and other assets. It simplifies the creation of various types of assets, ensuring they meet Android’s design guidelines.

To use Android Asset Studio:

  1. Visit the Android Asset Studio website.
  2. Select the type of asset you need (e.g., Launcher Icon, Action Bar Icon).
  3. Customize the asset using the available options.
  4. Download the generated assets and add them to the appropriate res subfolder in your project.

This tool helps maintain consistency and quality across all app assets.

Enhancing Your Xamarin Android App

Using WebView in Xamarin

WebView lets you display web content inside your app. First, add a WebView control to your layout file. Open your MainActivity.cs and set up the WebView. Here's a simple example:

csharp
using Android.App;
using Android.OS;
using Android.Webkit;

namespace MyXamarinApp
{
[Activity(Label = "WebView Example", MainLauncher = true)]
public class MainActivity : Activity
{
protected override void OnCreate(Bundle savedInstanceState)
{
base.OnCreate(savedInstanceState);
SetContentView(Resource.Layout.activity_main);

        WebView webView = FindViewById<WebView>(Resource.Id.webView);
        webView.Settings.JavaScriptEnabled = true;
        webView.LoadUrl("https://www.example.com");
    }
}

}

In the layout file (activity_main.axml), add:

xml


This code sets up a WebView that loads a webpage. You can customize it further by handling navigation events or adding custom JavaScript interfaces.

Code Signing and Keystore Management

Before publishing your app, you need to sign it with a keystore. Create a keystore using the keytool command:

sh
keytool -genkey -v -keystore my-release-key.keystore -alias my-key-alias -keyalg RSA -keysize 2048 -validity 10000

You'll be prompted to enter details like password, name, and organization. Keep this keystore file safe.

In Visual Studio, open your project properties, go to the Android Package Signing tab, and check "Sign the .APK using the following keystore details." Enter the path to your keystore, alias, and passwords. This ensures your app is signed and ready for distribution.

Cross-Platform Development with Xamarin.Forms

Xamarin.Forms allows you to write shared UI code for Android, iOS, and Windows. Start by creating a new Xamarin.Forms project. You'll see three projects: a shared project and platform-specific projects.

In the shared project, create a new page:

csharp
using Xamarin.Forms;

namespace MyXamarinApp
{
public class MainPage : ContentPage
{
public MainPage()
{
Content = new StackLayout
{
Children = {
new Label { Text = "Welcome to Xamarin.Forms!" }
}
};
}
}
}

Set this page as the main page in App.xaml.cs:

csharp
public App()
{
MainPage = new MainPage();
}

Run the app on any platform, and you'll see the same UI. Xamarin.Forms simplifies cross-platform development by letting you share most of your code.

Troubleshooting Common Issues

Common Build Errors

Build errors can be frustrating. One common issue is missing references. Ensure all necessary packages are installed via NuGet. Sometimes, cleaning and rebuilding the project helps. If you encounter Resource.Id does not exist, try rebuilding the project to regenerate the Resource.designer.cs file.

Debugging Tips

Effective debugging saves time. Use breakpoints to pause execution and inspect variables. The Android Device Monitor provides detailed logs. For more complex issues, consider using the Xamarin Profiler to analyze performance bottlenecks.

Performance Optimization

Optimizing performance makes your app smoother. Avoid unnecessary object creation and use efficient data structures. Minimize the use of heavy operations on the main thread to keep the UI responsive. Profiling tools can help identify slow parts of your app.

Wrapping Up Xamarin for Android

Xamarin stands as a game-changer for mobile app development, offering a unified codebase for both Android and iOS. This means you save time and effort by writing once and deploying everywhere. With its native performance and seamless access to device features, your apps will run smoothly and efficiently. Plus, the robust community support and rich resources make troubleshooting and learning a breeze. As Microsoft continues integrating Xamarin into .NET, expect more enhancements and updates. Dive into Xamarin today and start building high-quality, cross-platform apps that users will love!

Understanding Xamarin for Android

Xamarin is a cross-platform development tool that allows developers to create native Android apps using C#. It provides a single codebase for multiple platforms, reducing development time. Key functionalities include access to native APIs, shared code libraries, and integrated development environments like Visual Studio. This tool supports native user interfaces, ensuring apps look and feel like they belong on the device. Additionally, it offers performance optimization and testing tools to ensure high-quality apps.

What You Need to Use Xamarin

To ensure your device supports the feature, check these requirements:

  1. Operating System: Your device must run on Android 5.0 (Lollipop) or higher. Older versions won't support the feature.
  2. Processor: A 64-bit processor is necessary. Devices with 32-bit processors will not be compatible.
  3. RAM: At least 2GB of RAM is required. Devices with less memory may experience performance issues.
  4. Storage: Ensure you have at least 500MB of free storage. This space is needed for installation and smooth operation.
  5. Screen Resolution: A minimum screen resolution of 720p (1280x720) is needed. Lower resolutions might not display the feature correctly.
  6. Bluetooth: If the feature relies on Bluetooth, your device must support Bluetooth 4.0 or higher.
  7. Internet Connection: A stable internet connection is essential. Wi-Fi or mobile data will work, but a strong signal ensures better performance.
  8. Permissions: Grant necessary permissions like location, camera, and microphone access. Without these, the feature might not function properly.
  9. Battery: Ensure your device has at least 20% battery before using the feature. Low battery can cause interruptions.

Check these details to confirm your device's compatibility. If your device meets these criteria, you should be good to go!

Getting Started with Xamarin

  1. Download Xamarin from the official website.
  2. Install Visual Studio, ensuring to select the Xamarin workload during setup.
  3. Open Visual Studio and create a new project.
  4. Choose "Mobile App (Xamarin.Forms)" from the project templates.
  5. Name your project and select a location to save it.
  6. Click "Create" to set up the project.
  7. Select a template for your app (e.g., Blank, Master-Detail).
  8. Click "Create" again to finalize the project setup.
  9. Connect your Android device via USB or set up an Android emulator.
  10. Open the "Tools" menu, then navigate to "Android" and select "Android Device Manager."
  11. Configure your device or emulator settings.
  12. Run your project by clicking the green play button or pressing F5.
  13. Wait for the build process to complete and your app to launch on the device/emulator.

Done! Your Xamarin project is now set up and running.

Tips for Using Xamarin Efficiently

Xamarin is a powerful tool for building Android apps. Here are some tips to make the most out of it:

  1. Code Sharing: Use shared projects or .NET Standard libraries to share code between Android and iOS apps. This saves time and effort.

  2. UI Design: Leverage Xamarin.Forms for creating a single UI that works across platforms. Customize it using platform-specific code when needed.

  3. Performance: Optimize performance by using compiled bindings and avoiding unnecessary layout passes. Use the Xamarin Profiler to identify bottlenecks.

  4. Testing: Implement unit tests and UI tests using Xamarin.UITest. This ensures your app works correctly on different devices and screen sizes.

  5. Updates: Regularly update Xamarin and NuGet packages to benefit from the latest features and bug fixes.

  6. Native Features: Access native Android features using DependencyService or Custom Renderers. This allows you to use platform-specific functionality.

  7. Community: Engage with the Xamarin community through forums, GitHub, and social media. This helps you stay updated and get support when needed.

  8. Documentation: Always refer to official documentation and sample projects. They provide valuable insights and examples.

By following these tips, you can effectively use Xamarin to build robust and efficient Android apps.

Troubleshooting Xamarin Problems

Problem: App Crashes Frequently

  1. Check for Updates: Ensure both the app and device software are up-to-date.
  2. Clear Cache: Go to Settings > Apps > [App Name] > Storage > Clear Cache.
  3. Reinstall App: Uninstall the app, then download it again from the Play Store.
  4. Restart Device: Sometimes, a simple restart can fix many issues.

Problem: Battery Drains Quickly

  1. Reduce Screen Brightness: Lower the brightness or enable adaptive brightness.
  2. Close Background Apps: Swipe away or force stop apps running in the background.
  3. Battery Saver Mode: Enable battery saver mode in Settings.
  4. Check Battery Usage: Identify and manage apps consuming too much power in Settings > Battery.

Problem: Slow Performance

  1. Free Up Space: Delete unnecessary files, apps, or move data to an SD card.
  2. Disable Animations: Go to Developer Options and reduce or turn off animations.
  3. Restart Device: Restarting can help clear temporary files and improve speed.
  4. Update Software: Ensure the device has the latest software updates installed.

Problem: Connectivity Issues

  1. Toggle Airplane Mode: Turn on Airplane Mode for a few seconds, then turn it off.
  2. Restart Router: Power cycle your Wi-Fi router.
  3. Forget and Reconnect: Forget the Wi-Fi network, then reconnect with the password.
  4. Check Data Settings: Ensure mobile data is turned on and data limits are not exceeded.

Problem: Overheating

  1. Close Unused Apps: Close apps running in the background.
  2. Avoid Direct Sunlight: Keep the device out of direct sunlight or hot environments.
  3. Remove Case: Take off the phone case to allow better heat dissipation.
  4. Limit Intensive Tasks: Avoid running heavy apps or games for extended periods.

Problem: Bluetooth Not Pairing

  1. Toggle Bluetooth: Turn Bluetooth off and on again.
  2. Forget Device: Forget the Bluetooth device and try pairing again.
  3. Restart Devices: Restart both the phone and the Bluetooth device.
  4. Check Compatibility: Ensure both devices are compatible and within range.

Xamarin Security Tips

Using Xamarin for Android development involves handling user data with care. Encryption is crucial for protecting sensitive information. Always encrypt data both in transit and at rest. Implement secure authentication methods like OAuth or JWT to ensure only authorized users access the app. Regularly update your app to patch any security vulnerabilities.

For maintaining privacy, limit the permissions your app requests. Only ask for what’s absolutely necessary. Use anonymous data collection whenever possible to minimize the risk of exposing personal information. Always inform users about what data you collect and why, ensuring transparency.

Enable two-factor authentication (2FA) for an extra layer of security. Regularly audit your code for security flaws and consider using tools like static code analyzers to catch potential issues early. Finally, educate users on best practices, such as using strong passwords and recognizing phishing attempts.

Comparing Xamarin with Other Tools

Pros of Xamarin:

  • Cross-Platform Development: Write code once, run on both Android and iOS.
  • C# Language: Uses a popular, powerful language.
  • Native Performance: Offers near-native performance.
  • Shared Codebase: Reduces development time and costs.
  • Large Community: Access to extensive resources and support.

Cons of Xamarin:

  • App Size: Larger app sizes compared to native apps.
  • Performance: Slightly slower than fully native apps.
  • Limited Access: Some platform-specific features may be harder to implement.
  • Learning Curve: Requires knowledge of both C# and platform-specific APIs.
  • Updates: Lags behind the latest platform updates.

Alternatives:

  • React Native: Uses JavaScript, offers fast refresh, and has a large community.
  • Flutter: Uses Dart, provides a rich set of pre-designed widgets, and offers high performance.
  • Ionic: Uses web technologies like HTML, CSS, and JavaScript, and offers a large library of plugins.
  • Native Development: Directly use Swift for iOS and Kotlin/Java for Android for full control and performance.

Problem: App Crashes Frequently

  1. Check for Updates: Ensure both the app and device software are up-to-date.
  2. Clear Cache: Go to Settings > Apps > [App Name] > Storage > Clear Cache.
  3. Reinstall App: Uninstall the app, then download it again from the Play Store.
  4. Restart Device: Sometimes, a simple restart can fix many issues.

Problem: Battery Drains Quickly

  1. Reduce Screen Brightness: Lower the brightness or enable adaptive brightness.
  2. Close Background Apps: Swipe away or force stop apps running in the background.
  3. Battery Saver Mode: Enable battery saver mode in Settings.
  4. Check Battery Usage: Identify and manage apps consuming too much power in Settings > Battery.

Problem: Slow Performance

  1. Free Up Space: Delete unnecessary files, apps, or move data to an SD card.
  2. Disable Animations: Go to Developer Options and reduce or turn off animations.
  3. Restart Device: Restarting can help clear temporary files and improve speed.
  4. Update Software: Ensure the device has the latest software updates installed.

Problem: Connectivity Issues

  1. Toggle Airplane Mode: Turn on Airplane Mode for a few seconds, then turn it off.
  2. Restart Router: Power cycle your Wi-Fi router.
  3. Forget and Reconnect: Forget the Wi-Fi network, then reconnect with the password.
  4. Check Data Settings: Ensure mobile data is turned on and data limits are not exceeded.

Problem: Overheating

  1. Close Unused Apps: Close apps running in the background.
  2. Avoid Direct Sunlight: Keep the device out of direct sunlight or hot environments.
  3. Remove Case: Take off the phone case to allow better heat dissipation.
  4. Limit Intensive Tasks: Avoid running heavy apps or games for extended periods.

Problem: Bluetooth Not Pairing

  1. Toggle Bluetooth: Turn Bluetooth off and on again.
  2. Forget Device: Forget the Bluetooth device and try pairing again.
  3. Restart Devices: Restart both the phone and the Bluetooth device.
  4. Check Compatibility: Ensure both devices are compatible and within range.

Xamarin's Benefits for Android Development

Xamarin offers a powerful toolkit for Android development. It allows developers to write code in C#, which can be shared across multiple platforms. This means less time spent writing and maintaining code. Xamarin also provides access to native APIs, ensuring apps perform well and look native. The integration with Visual Studio makes it easy to manage projects and debug code. Plus, Xamarin.Forms simplifies UI design by letting you create a single interface for both Android and iOS. The community support and extensive documentation make it easier to troubleshoot issues and learn new techniques. Overall, Xamarin streamlines the development process, saving time and resources while delivering high-quality apps.

What is Xamarin?

Xamarin is a framework that lets you build Android and iOS apps using C# and .NET. It helps developers share code across different platforms.

Why should I use Xamarin for Android development?

Xamarin allows you to write one codebase for both Android and iOS. This saves time and effort, making it easier to maintain your app.

Is Xamarin free to use?

Yes, Xamarin is part of Microsoft's Visual Studio. There's a free version available, but there are also paid options with more features.

How does Xamarin handle performance?

Xamarin apps are compiled into native code, which means they run just as fast as apps written in Java or Swift. This ensures high performance.

Can I access native Android features with Xamarin?

Absolutely! Xamarin gives you access to native APIs and features, so you can use things like the camera, GPS, and Bluetooth just like you would in a native app.

What kind of support and resources are available for Xamarin?

There's a large community of developers, plenty of documentation, and many tutorials available online. Microsoft also offers support through Visual Studio.

Do I need to learn a new language to use Xamarin?

If you already know C# and .NET, you're good to go. Xamarin uses these languages, so there's no need to learn something new.

Was this page helpful?