
Introduction
Android Studio is a powerful integrated development environment (IDE) for developing Android applications. However, it can be resource-intensive, especially when running emulators or performing complex builds. This guide will walk you through setting up remote development with Android Studio, leveraging tools like JetBrains Projector and SSH tunneling to optimize your workflow.
Why Remote Development?
Remote development is particularly useful when you need to offload resource-intensive tasks from your local machine. Here are a few scenarios where remote development can be beneficial:
- Resource Constraints: If your local machine lacks the necessary processing power or memory to handle large projects, a remote server can provide the necessary resources.
- Multi-Tasking: When you need to perform other tasks simultaneously, such as watching videos or playing games, a remote server can handle the development tasks without affecting your local machine's performance.
- Collaboration: Remote development allows multiple developers to work on the same project from different locations, making it easier to collaborate and manage large teams.
Setting Up Remote Development with JetBrains Projector
JetBrains Projector is a tool that allows you to run IntelliJ-based IDEs, including Android Studio, on any device with a web browser. Here’s how to set it up:
Step 1: Download and Extract Android Studio
First, download and extract Android Studio to a location on your remote server. This will be the base directory for your project.
Step 2: Add Android Studio to Projector
To add Android Studio to JetBrains Projector, you need to specify the path to the Android Studio installation. This can be done using the command line interface. Here’s how:
- Open Command Line Interface: Open a terminal or command prompt on your remote server.
- Navigate to Projector Directory: Navigate to the directory where JetBrains Projector is installed.
- Add Android Studio Path: Use the following command to add the path to Android Studio:
bash
projector add /path/to/android/studio
Step 3: Configure SSH Tunneling
To connect to a real device or emulator over the internet, you need to set up an SSH tunnel. This allows ADB to connect to the remote server.
-
Set Up SSH Tunnel: On your local machine, use an SSH client (like OpenSSH or plink) to create a tunnel that forwards the ADB server running locally on port 5037 to the server on port 5038.
bash
ssh -L 5038:localhost:5037 user@remote-server-ip -
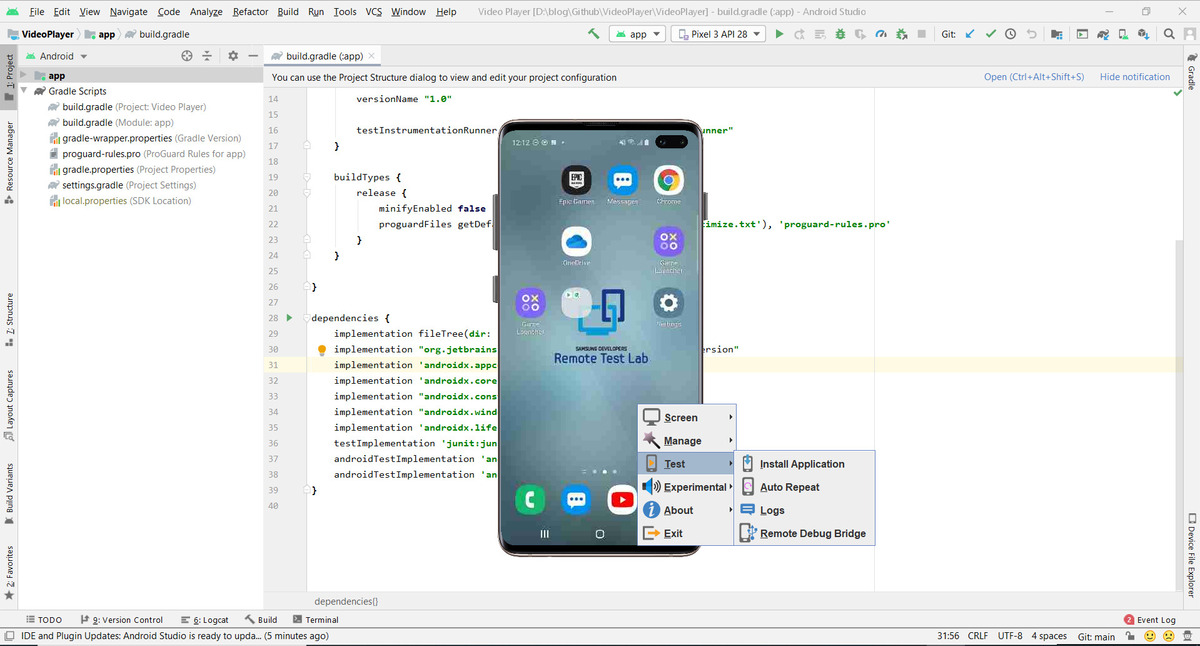
Configure Android Studio: In Android Studio, go to
File > Settings > Experimental > Enable ADB over network. Then, set the port to 5038. -
Connect to Device: Now you can connect to your device or emulator using the SSH tunnel.
Step 4: Connect to Projector
Once you have set up your SSH tunnel and configured Android Studio, you can connect to JetBrains Projector.
- Open Projector: Open JetBrains Projector in your web browser.
- Select Project: Select the project you want to work on.
- Start IDE: Start the IDE instance in Projector.
Using Android Studio with Remote Server
Now that you have set up your remote development environment, here’s how you can use Android Studio effectively:
Step 1: Clone Repository
Clone your repository on the remote server if it’s not already there.
bash
git clone https://github.com/your-repo.git
Step 2: Build Project
Build your project using Gradle or other build tools supported by Android Studio.
bash
./gradlew build
Step 3: Run and Debug
Run and debug your application using the remote server. You can use the same workflow as you would with a local machine.
Additional Tools for Remote Development
While JetBrains Projector is a powerful tool, there are other tools and techniques you can use to enhance your remote development experience:
Jenkins CI/CD
Jenkins is a popular continuous integration/continuous deployment (CI/CD) tool that can automate your build process. Here’s how to set it up:
- Install Jenkins: Install Jenkins on your remote server.
- Configure Jenkins: Configure Jenkins to build your project whenever there are changes in the repository.
- Deploy APK: Deploy the APK to a server or push it to your desktop/device using SCP or SFTP.
Docker Containers
Docker containers can be used to host the Android SDK and other tools on the cloud with SSH exposed. This allows you to use tools like MainFramer or JetBrains Gateway for remote builds.
TeamCity Server
TeamCity is another CI/CD tool that supports Android development. You can configure it to build signed release builds when commits are made to master and signed builds when any other branch is pushed.
Common Issues and Solutions
Resource Constraints
One common issue with remote development is resource constraints. Here are some solutions:
- Upgrade RAM: Upgrade your RAM if possible. Adding more RAM can significantly improve performance.
- Use Physical Devices: Use physical devices for testing instead of emulators.
- Enable Swap File/Partition: Enable zram/zswap and make sure you have a swapfile/swap partition.
Network Speed
Network speed isn’t usually a concern for remote development, but if it is, consider using a high-speed internet connection or optimizing your network settings.
Emulator Performance
Emulators can be resource-intensive and slow down your laptop. Here’s how to improve emulator performance:
- Use Genymotion: Use Genymotion instead of the official Android emulator.
- Optimize Settings: Optimize your emulator settings to reduce resource usage.
Final Thoughts
Remote development with Android Studio using tools like JetBrains Projector and SSH tunneling can significantly improve your productivity by offloading resource-intensive tasks from your local machine. By following the steps outlined in this guide, you can set up a robust remote development environment that allows you to work efficiently from anywhere.
Feature Overview
This feature allows developers to code and debug Android applications on a remote server. It provides a seamless integration with Android Studio, enabling real-time collaboration and resource sharing. Key functionalities include remote build and execution, live editing, and synchronized project files. This ensures that developers can work from any location without needing powerful local hardware.
Compatibility and Requirements
To use Android Studio Remote Development, your device needs to meet specific requirements. First, ensure your operating system is Windows 10, macOS 10.14 Mojave, or a Linux distribution like Ubuntu 18.04. Your processor should be at least an Intel i5 or AMD Ryzen 5.
Next, check your RAM. You need a minimum of 8GB, but 16GB is recommended for smoother performance. Storage should be at least SSD with 10GB free space. For graphics, an integrated GPU works, but a dedicated GPU like NVIDIA GTX 1050 will enhance performance.
Your internet connection must be stable, with at least 10 Mbps download and 5 Mbps upload speeds. Ensure your Java Development Kit (JDK) is version 11 or higher.
For Android devices, they should run Android 5.0 Lollipop or newer. Enable USB debugging in the developer options.
Lastly, ensure your IDE is Android Studio 4.1 or newer. Update your SDK tools to the latest version.
Meeting these requirements ensures your device supports Android Studio Remote Development efficiently.
Feature Setup Guide
Install Android Studio: Download from the official website. Follow the installation prompts.
Open Android Studio: Launch the program after installation.
Create a New Project: Click on "Start a new Android Studio project." Choose a template, name your project, and set the save location.
Enable Remote Development: Go to File > Settings (or Preferences on Mac). Navigate to Plugins. Search for "Remote Development" and install it.
Configure Remote Server: Open Tools > Deployment > Configuration. Add a new server by entering the server's IP address, username, and password.
Connect to Server: Click on Tools > Deployment > Browse Remote Host. Select the server you configured.
Sync Project: Right-click on your project folder. Choose Deployment > Sync with Deployed to Remote Host.
Run Project Remotely: Click on the green play button. Select the remote server as the deployment target.
Monitor Output: Check the Run window for logs and output from the remote server.
Debugging: Use breakpoints as usual. The debugger will connect to the remote server.
Disconnect: When done, go to Tools > Deployment > Disconnect from Remote Host.
Effective Usage Tips
1. Stable Connection: Ensure a strong internet connection. Remote development needs a reliable network to avoid disruptions.
2. Sync Settings: Regularly sync your settings between local and remote environments. This keeps your tools and preferences consistent.
3. Use Shortcuts: Familiarize yourself with keyboard shortcuts. They speed up coding and navigation, making remote work smoother.
4. Efficient File Management: Keep your project files organized. Use clear naming conventions and folder structures to find files quickly.
5. Regular Backups: Always backup your work. Use cloud storage or external drives to prevent data loss.
6. Optimize Performance: Close unnecessary applications to free up resources. This ensures your development environment runs efficiently.
7. Security Measures: Use strong passwords and enable two-factor authentication. Protect your remote development setup from unauthorized access.
8. Collaboration Tools: Utilize communication tools like Slack or Teams. They help in staying connected with your team and sharing updates.
9. Debugging: Use remote debugging features. This allows you to troubleshoot issues directly on the remote server.
10. Documentation: Maintain clear documentation of your setup and processes. This helps in onboarding new team members and troubleshooting issues.
Troubleshooting Common Problems
Problem: Slow Performance
Solution:
- Close unused applications.
- Increase allocated RAM in settings.
- Use SSD for storage.
- Disable unnecessary plugins.
Problem: Emulator Not Starting
Solution:
- Check for updates.
- Ensure virtualization is enabled in BIOS.
- Allocate more RAM to the emulator.
- Delete and recreate the virtual device.
Problem: Gradle Build Fails
Solution:
- Clear Gradle cache.
- Sync project with Gradle files.
- Update dependencies.
- Check for typos in build.gradle.
Problem: Code Changes Not Reflecting
Solution:
- Rebuild the project.
- Invalidate caches and restart.
- Ensure Instant Run is enabled.
- Clean project and rebuild.
Problem: Debugger Not Working
Solution:
- Check USB connection.
- Enable USB debugging on the device.
- Restart Android Studio.
- Ensure correct debug configuration is selected.
Problem: Layout Editor Issues
Solution:
- Update Android Studio.
- Switch to text view and back.
- Check for missing resources.
- Restart the IDE.
Problem: APK Not Installing
Solution:
- Check for sufficient storage on the device.
- Ensure the device is not in sleep mode.
- Verify the APK is signed.
- Use adb install command manually.
Problem: Memory Leaks
Solution:
- Use Android Profiler to identify leaks.
- Avoid static references to context.
- Release resources in onDestroy().
- Use WeakReference where appropriate.
Problem: Sync Issues with Firebase
Solution:
- Check internet connection.
- Ensure correct JSON file is added.
- Update Firebase dependencies.
- Re-authenticate with Firebase.
Privacy and Security Tips
Using remote development in Android Studio involves handling user data with care. Encryption is key. Always ensure data transferred between your local machine and remote server is encrypted. Use SSH (Secure Shell) for secure connections.
Authentication matters. Use strong passwords or SSH keys for logging into remote servers. Avoid using public Wi-Fi for remote development unless connected through a VPN (Virtual Private Network).
Access control is crucial. Limit access to your remote server. Only authorized users should have access. Regularly update your software to patch vulnerabilities.
Data storage should be secure. Store sensitive data in encrypted formats. Avoid storing passwords in plain text. Use environment variables for sensitive information.
Backup your data. Regularly backup your work to prevent data loss. Use secure backup solutions to protect your data.
Monitor your server. Regularly check logs for suspicious activity. Use tools like fail2ban to block repeated failed login attempts.
Privacy tips: Be cautious about sharing your screen during remote development. Disable screen sharing when not needed. Use privacy screens to prevent shoulder surfing.
By following these practices, you can maintain security and privacy while using Android Studio for remote development.
Comparing Alternatives
Pros:
- Flexibility: Android Studio allows remote development, letting you code from anywhere. Similar to Visual Studio Code with its Remote Development extensions.
- Integration: Works seamlessly with Android devices. Xcode offers similar integration for iOS devices.
- Customization: Highly customizable with plugins. Eclipse also offers extensive plugin support.
- Performance: Efficient for Android app development. IntelliJ IDEA provides robust performance for Java and Kotlin.
Cons:
- Resource-Intensive: Requires significant system resources. Visual Studio Code is lighter on resources.
- Complex Setup: Initial setup can be complicated. JetBrains Rider offers a more straightforward setup process.
- Limited to Android: Primarily for Android development. Xamarin allows cross-platform development for both Android and iOS.
- Learning Curve: Steeper learning curve for beginners. Thonny is more beginner-friendly for Python development.
Alternatives:
- Visual Studio Code: Lightweight, supports multiple languages, and has remote development extensions.
- Xcode: Best for iOS and macOS development with seamless integration.
- IntelliJ IDEA: Excellent for Java and Kotlin, with strong performance and customization.
- Eclipse: Offers extensive plugin support and is highly customizable.
- JetBrains Rider: Easier setup, good for .NET development.
- Xamarin: Cross-platform development for Android and iOS.
- Thonny: Beginner-friendly, ideal for Python development.
Remote Development with Android Studio
Remote development with Android Studio offers flexibility and efficiency. By setting up a remote server, developers can work from anywhere without needing powerful local machines. This setup reduces hardware costs and allows for seamless collaboration among team members.
Using SSH and VS Code extensions, you can connect to remote environments easily. This method ensures that your development environment remains consistent, regardless of where you are working. It also helps in managing resources better, as the heavy lifting is done on the remote server.
Remember to keep your remote server secure by using strong passwords and regularly updating your software. Regular backups are also crucial to prevent data loss.
Incorporating remote development into your workflow can significantly boost productivity and make your development process more adaptable to changing needs. Give it a try and see how it transforms your coding experience.
What is Android Studio Remote Development?
Android Studio Remote Development lets you work on Android projects from a different computer. You connect to a powerful server that handles the heavy lifting, so your local machine doesn't have to.
How do I set up Android Studio for remote development?
First, install Android Studio on your local machine. Then, set up a remote server with the necessary tools and libraries. Use SSH to connect your local machine to the server. Configure Android Studio to use the remote server for building and running your projects.
What are the benefits of using remote development?
Remote development offers several perks. It reduces the load on your local machine, speeds up build times, and allows you to work from anywhere. Plus, you can use a more powerful server to handle complex tasks.
Can I use any server for remote development?
Not exactly. The server needs to have the right specs and software. It should run a compatible OS, have enough RAM and CPU power, and have Android SDK and other necessary tools installed.
Is remote development secure?
Yes, if done correctly. Use SSH for secure connections and ensure your server has strong security measures in place. Regularly update your software and use strong passwords to keep your data safe.
What are the common issues with remote development?
Common issues include network latency, connection drops, and configuration errors. Make sure your internet connection is stable and double-check your settings. Sometimes, firewall settings can also cause problems.
Do I need a fast internet connection for remote development?
A fast and stable internet connection is highly recommended. Slow connections can lead to lag and make the development process frustrating. Aim for a reliable connection to ensure smooth workflow.