
Step 1: Planning and Requirements Gathering
Before coding, plan and gather requirements for your food delivery app. Consider these key features:
- Registration and Login: Users should register and log in using email, phone number, or social media platforms like Facebook, Google, and Apple.
- Restaurant Search: Allow users to search for nearby restaurants based on geolocation. Filters like cuisine, rating, and distance should be available.
- Location Tracking: Users should track their orders in real-time using an integrated map feature. Display the estimated delivery time.
- Order Placement and Payment: Simplify the checkout process. Integrate payment options like Braintree, Stripe, or PayPal.
- Push Notifications: Send notifications about delivery stages and special offers.
Step 2: Setting Up Android Studio
To start building your food delivery app, set up Android Studio:
Download and Install Android Studio
- Visit the official Android Studio website and download the latest version.
- Follow the installation instructions to set up the environment.
Create a New Project
- Open Android Studio and click on “Start a new Android Studio project.”
- Choose “Empty Activity” as the project template.
- Name your project (e.g., FoodDeliveryApp).
- Set the language to Java or Kotlin.
- Choose the minimum SDK version (e.g., API 21: Android 5.0 Lollipop).
- Click “Finish” to create the project.
Step 3: Designing the UI/UX
A well-designed UI/UX is crucial for a food delivery app:
Welcome Screen
- Include the title of your food delivery app and a button to get started.
- Use a clean and modern design with clear visuals.
Login Screen
- Allow users to register or log in using email, phone number, or social media platforms.
- Include password change and recovery features.
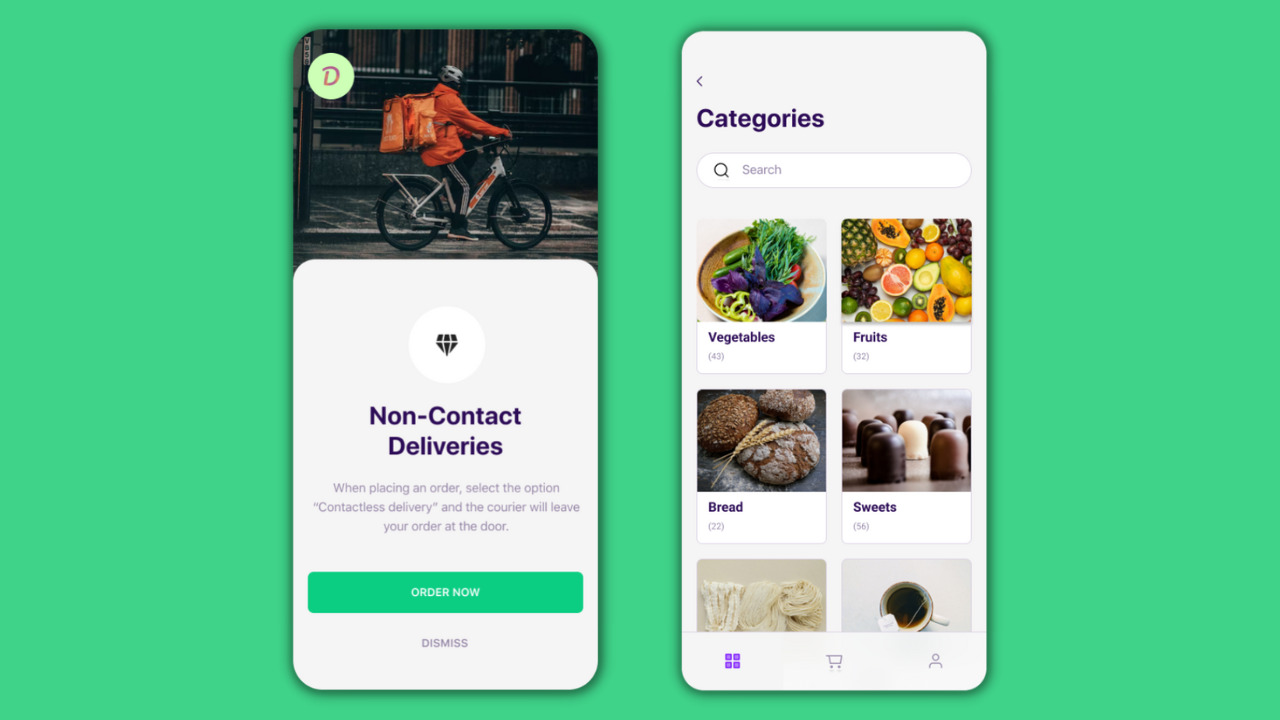
Home Screen
- Display a list of nearby restaurants with filters like cuisine and rating.
- Include a search bar for users to find specific restaurants.
- Use a bottom navigation bar to navigate between the Home Screen, Orders, and Profile sections.
Restaurant Details Screen
- Display detailed information about the restaurant, including its menu and reviews.
- Allow users to add items to their cart and proceed to checkout.
Cart Screen
- Display all items added by the user along with their prices and quantities.
- Allow users to edit or remove items from their cart.
Checkout Screen
- Simplify the payment process by integrating payment gateways like Braintree, Stripe, or PayPal.
- Display the total cost of the order and allow users to apply promo codes or discounts.
Order Confirmation Screen
- After successful payment, display an order confirmation screen with order details and estimated delivery time.
- Send a push notification to the user confirming their order.
Order Tracking Screen
- Allow users to track their orders in real-time using an integrated map feature.
- Display the live location of the delivery person and the restaurant.
Step 4: Integrating APIs and Backend Services
Make your food delivery app functional by integrating various APIs and backend services:
Firebase Authentication
- Use Firebase Authentication to handle user registration and login.
- Enable Firebase Authentication in your project settings and connect it with your Firebase console.
Firebase Realtime Database
- Use Firebase Realtime Database to store user data, restaurant information, and order details.
- Set up the database structure according to your app’s requirements.
Payment Gateway Integration
- Integrate payment gateways like Braintree, Stripe, or PayPal using their respective APIs.
- Handle payment transactions securely and display the total cost of the order.
Location Tracking API
- Use Google Location API for Android to track the live location of the delivery person and the restaurant.
- Display the estimated delivery time based on the location data.
Push Notifications
- Use Firebase Cloud Messaging (FCM) to send push notifications about delivery stages and special offers.
- Customize notification messages according to different stages of the order.
Step 5: Implementing Features
With your project set up and necessary APIs and backend services integrated, implement the features of your food delivery app:
Restaurant Dashboard
Add Food Items
- Allow admins to add new food items with images, descriptions, and prices.
- Use a plus icon to add new items and an i button to view all orders.
Manage Orders
- Display all orders placed by different customers in the restaurant dashboard.
- Use buttons to show the live location of the passenger and the restaurant for each order.
Passenger Dashboard
Search Restaurants
- Allow passengers to search for nearby restaurants based on their geolocation.
- Use filters like cuisine and rating to make the search process faster and more convenient.
Order Food
- Display the menu of the selected restaurant and allow passengers to add items to their cart.
- Use a cart option in the top right corner to view and edit items in the cart.
Track Orders
- Allow passengers to track their orders in real-time using an integrated map feature.
- Display the live location of the delivery person and the restaurant for each order.
Delivery Dashboard
Receive Orders
- Display all orders placed by different passengers in the delivery dashboard.
- Use buttons to show the live location of the passenger and the restaurant for each order.
Deliver Orders
- Mark orders as delivered once they are delivered to the passenger.
- Send a push notification to the passenger confirming that their order has been delivered.
Step 6: Testing and Debugging
Testing and debugging are crucial steps in ensuring that your food delivery app works seamlessly without any bugs or critical errors:
Unit Testing
- Write unit tests for individual components of your app to ensure they work correctly.
- Use tools like JUnit or Mockito for unit testing.
Integration Testing
- Write integration tests to test how different components of your app interact with each other.
- Use tools like Espresso or Robolectric for integration testing.
UI Testing
- Write UI tests to test the user interface of your app.
- Use tools like Espresso or Appium for UI testing.
Debugging
- Use Android Studio’s built-in debugging tools like breakpoints and logcat to identify and fix bugs.
- Use tools like Stetho or LeakCanary to detect memory leaks and other performance issues.
Step 7: Releasing and Promoting Your App
After testing and debugging your food delivery app, release it on the Google Play Store and other app stores:
Prepare Your App for Release
- Ensure that all features of your app are working correctly and there are no bugs or critical errors.
- Optimize your app for different screen sizes and devices.
Submit Your App to the Google Play Store
- Create a developer account on the Google Play Developer Console.
- Fill out the required information about your app, including screenshots and promotional materials.
- Upload your app’s APK file and wait for it to be reviewed by Google Play Store moderators.
Promote Your App
- Use social media platforms like Facebook, Twitter, and Instagram to promote your app.
- Run targeted ads on Google Ads or Facebook Ads to reach a wider audience.
- Collaborate with influencers or bloggers in the food delivery niche to review and promote your app.
- Monitor user feedback and reviews closely to address issues promptly and improve user satisfaction.
Creating a food delivery app using Android Studio involves several steps, from designing the UI/UX to integrating various APIs and backend services. By following this guide, you can build a functional and user-friendly food delivery app that meets the needs of your target audience. Test and debug your app thoroughly before releasing it on the app stores, and promote it effectively to attract more users. With continuous improvement and user engagement, you can build a loyal customer base and drive app downloads.