Android Studio for Chromebook: Complete Guide

Android Studio
android-studio-for-chromebook-complete-guide
Source: The-coding-hub.medium.com

Introduction to Android Studio on Chromebook

Overview of Android Studio:

Android Studio is the official integrated development environment (IDE) for Android app development. It provides tools for coding, debugging, and testing apps. Developers use it to create apps for phones, tablets, TVs, and other devices that run on Android. With features like a code editor, emulator, and performance analyzers, Android Studio makes building Android apps easier and more efficient.

Why Use a Chromebook for Development:

Using a Chromebook for Android development offers several benefits. Chromebooks are generally lightweight, affordable, and have great battery life. They also run ChromeOS, which is secure and easy to use. With the ability to run Linux apps, Chromebooks can handle development tasks just like traditional laptops. Plus, they often come with touchscreens, which can be handy for testing Android apps.

Key Takeaways:

  • Chromebooks can be powerful tools for Android app development, offering a lightweight, affordable, and secure environment with great battery life and touchscreen capabilities.
  • Setting up Android Studio on a Chromebook involves enabling Linux, downloading the software, and using commands to install and deploy apps, making it a versatile development platform.

Setting Up the Development Environment

System Requirements for Android Studio:

To run Android Studio on a Chromebook, you'll need a device with an Intel or AMD processor. ARM processors aren't supported yet. Ensure your Chromebook has at least 8GB of RAM for smooth performance. You'll also need to enable Linux (Beta) on your Chromebook, which requires ChromeOS version 69 or later. Make sure you have enough storage space, as Android Studio and its components can take up several gigabytes.

Installing Android Studio on ChromeOS:

First, enable Linux (Beta) on your Chromebook through the settings menu. Once Linux is set up, open the Terminal app. Download the Android Studio package by entering the command: wget https://dl.google.com/dl/android/studio/ide-zips/2021.1.1.22/android-studio-2021.1.1.22-linux.tar.gz. Extract the downloaded file with tar -xvf android-studio-2021.1.1.22-linux.tar.gz. Navigate to the extracted directory and run ./studio.sh to start Android Studio. Follow the setup wizard to complete the installation.

Enable ADB Debugging:

To enable ADB debugging on ChromeOS, first, open the settings menu and go to "Linux (Beta)." Click on "Develop Android apps" and then toggle the "Enable ADB debugging" switch. Confirm your choice and restart your Chromebook. After rebooting, open the Terminal app and enter sudo apt-get install adb to install ADB. Finally, connect your Android device via USB and run adb devices to verify the connection.

Deploying Apps from ChromeOS

Deploy with Android Studio

Deploying apps directly from Android Studio on a Chromebook is straightforward. First, ensure your project is open in Android Studio. Connect your device via USB or ensure it's discoverable over the network. In Android Studio, click on the "Run" button or press Shift + F10. A dialog will appear, listing available devices. Select your device and click "OK." Android Studio will compile and deploy your app to the selected device. If there are any issues, check the "Run" window for error messages and troubleshoot accordingly.

Deploy with Terminal

Deploying apps using the terminal on ChromeOS involves a few simple commands. Open the Linux terminal on your Chromebook. Navigate to your project's directory using the cd command. Ensure your device is connected via USB or available over the network. Use the command adb devices to list connected devices. Once your device is listed, deploy your app using adb install path/to/your/app.apk. Replace path/to/your/app.apk with the actual path to your APK file. If successful, the terminal will display a message indicating the app has been installed.

Connect to ADB over a Network

Connecting to ADB over a network allows for wireless app deployment. First, ensure both your Chromebook and Android device are on the same Wi-Fi network. On your Android device, enable Developer Options and ADB Debugging. Connect your device to the Chromebook via USB and run adb tcpip 5555 in the terminal. Disconnect the USB cable and find the device's IP address in the Wi-Fi settings. In the terminal, type adb connect device_ip_address:5555, replacing device_ip_address with the actual IP address. Your device should now be connected over the network.

Connect to ADB over USB

Connecting to ADB over USB is often the most reliable method for app deployment. First, enable Developer Options and USB Debugging on your Android device. Connect your device to the Chromebook using a USB cable. Open the terminal and type adb devices to ensure your device is recognized. If prompted on your device, allow USB debugging. Once your device appears in the list, you can deploy apps using adb install path/to/your/app.apk. This method ensures a stable connection for deploying and debugging your apps.

Optimizing Your App for ChromeOS

Update Your App's Manifest File

Updating your app's manifest file is crucial for ChromeOS compatibility. Open the AndroidManifest.xml file in your project. Add the following attributes within the <application> tag:

xml

These attributes ensure your app can handle different screen sizes and orientations. Additionally, specify any required hardware features using the <uses-feature> tag to avoid compatibility issues.

Update Your Target SDK

Updating your target SDK ensures your app leverages the latest features and optimizations. Open the build.gradle file in your project. Locate the compileSdkVersion and targetSdkVersion properties and update them to the latest SDK version. For example:

groovy
android {
compileSdkVersion 31
defaultConfig {
targetSdkVersion 31
}
}

Sync your project with Gradle files to apply the changes. This update helps your app perform better on newer devices and operating systems.

Check for Networking Requirements

Ensuring your app meets networking requirements for ChromeOS is essential. Verify that your app handles different network conditions gracefully. Implement checks for network availability and handle scenarios where the network is slow or unavailable. Use the ConnectivityManager class to monitor network status and adjust your app's behavior accordingly. This ensures a smooth user experience regardless of network conditions.

Use Cloud and Local Storage Effectively

Using cloud and local storage effectively can enhance your app's performance and user experience. For cloud storage, consider using services like Firebase or Google Cloud Storage. These services offer robust APIs for storing and retrieving data. For local storage, use SharedPreferences for small amounts of data and Room for more complex data structures. Balancing cloud and local storage helps ensure data availability and reduces reliance on network connectivity.

Testing and Debugging

Develop New Test Cases for Your App

Creating test cases ensures your app runs smoothly on ChromeOS. Start by identifying key features and user interactions. Write tests that cover these areas, focusing on different scenarios users might encounter. Automated tests save time and catch issues early. Tools like JUnit and Espresso can help automate testing. Manual testing is also crucial for catching edge cases automated tests might miss.

Multi-window and Orientation Changes

Handling multi-window and orientation changes is vital for a good user experience. ChromeOS supports multi-window mode, so your app should adapt seamlessly. Use the onConfigurationChanged method to manage changes in screen orientation and window size. Test your app in different configurations to ensure it remains functional and user-friendly.

ADB Over Wi-Fi and Ethernet

Using ADB over Wi-Fi and Ethernet simplifies testing and debugging. First, connect your Chromebook and development machine to the same network. Enable ADB debugging on your Chromebook, then use the adb connect command followed by your Chromebook's IP address. This setup allows you to deploy and debug apps wirelessly, making the process more flexible and efficient.

Clear Messages App Cache and Data

Clearing the cache and data of the Messages app can resolve many issues. Go to Settings, then Apps, and find the Messages app. Select it, then choose Storage. Here, you can clear the cache and data. This action removes temporary files and resets the app, often fixing bugs and improving performance.

Update or Reinstall the Messages App

Updating or reinstalling the Messages app can fix persistent bugs. Check for updates in the Google Play Store. If an update is available, install it. If updating doesn't help, uninstall the app and reinstall it. This process ensures you have the latest version and can resolve issues caused by corrupted files.

Additional Tools and Resources

Android Emulator Support

Android emulator support on ChromeOS is a game-changer for developers. Emulators let you test apps on different devices without needing physical hardware. ChromeOS supports Android emulators, making it easier to develop and test apps directly on your Chromebook. This feature saves time and resources, streamlining the development process.

Supported Devices for the Android Emulator

Not all Chromebooks support Android emulators. Devices with Intel processors and at least 4GB of RAM generally work best. Check your device's specifications to ensure compatibility. Using a supported device ensures smooth performance and reliable testing, helping you develop high-quality apps.

More Tools for Android Developers

Several tools can enhance your Android development experience on ChromeOS. Android Studio is the primary tool, but others like Visual Studio Code, Git for version control, and Firebase for backend services are also useful. These tools provide a comprehensive development environment, helping you build, test, and deploy apps efficiently.

Final Thoughts on Embracing Technology

In the grand scheme of things, technology's ever-evolving landscape offers endless opportunities and challenges. From developing apps on a Chromebook to leveraging cloud storage and debugging tools, the path is filled with learning curves and breakthroughs. At its core, embracing these advancements can make everyday tasks more efficient and fun. With the right tools and a curious mindset, anyone can dive into the tech world and create something amazing. So, roll up your sleeves, fire up those gadgets, and let your imagination run wild—there's a whole digital playground waiting to be explored!

Feature Overview

Android Studio for Chromebook lets developers create, test, and debug Android apps directly on their Chromebooks. It offers a full suite of tools for coding, including an intelligent code editor, real-time error detection, and a visual layout editor. Users can emulate different devices to see how apps perform on various screen sizes and configurations. The feature also supports instant run, allowing for quick testing of changes without restarting the app. Integrated version control helps manage code changes efficiently.

Compatibility and Requirements

To run Android Studio on a Chromebook, your device must meet specific requirements. First, ensure your Chromebook supports Linux (Beta), also known as Crostini. This feature is available on most Chromebooks released after 2019.

Your Chromebook should have at least 8GB of RAM for smooth performance. While 4GB might work, it could lead to slowdowns. Storage is another crucial factor. Aim for at least 64GB of internal storage. Android Studio and its components can take up significant space.

The processor matters too. A Intel Core i3 or higher is recommended. ARM-based processors might face compatibility issues. Check if your Chromebook has an x86_64 architecture for the best experience.

Ensure your Chrome OS version is M80 or later. Older versions might lack necessary features or security updates. To verify, go to Settings > About Chrome OS.

Lastly, a stable internet connection is vital. Downloading Android Studio
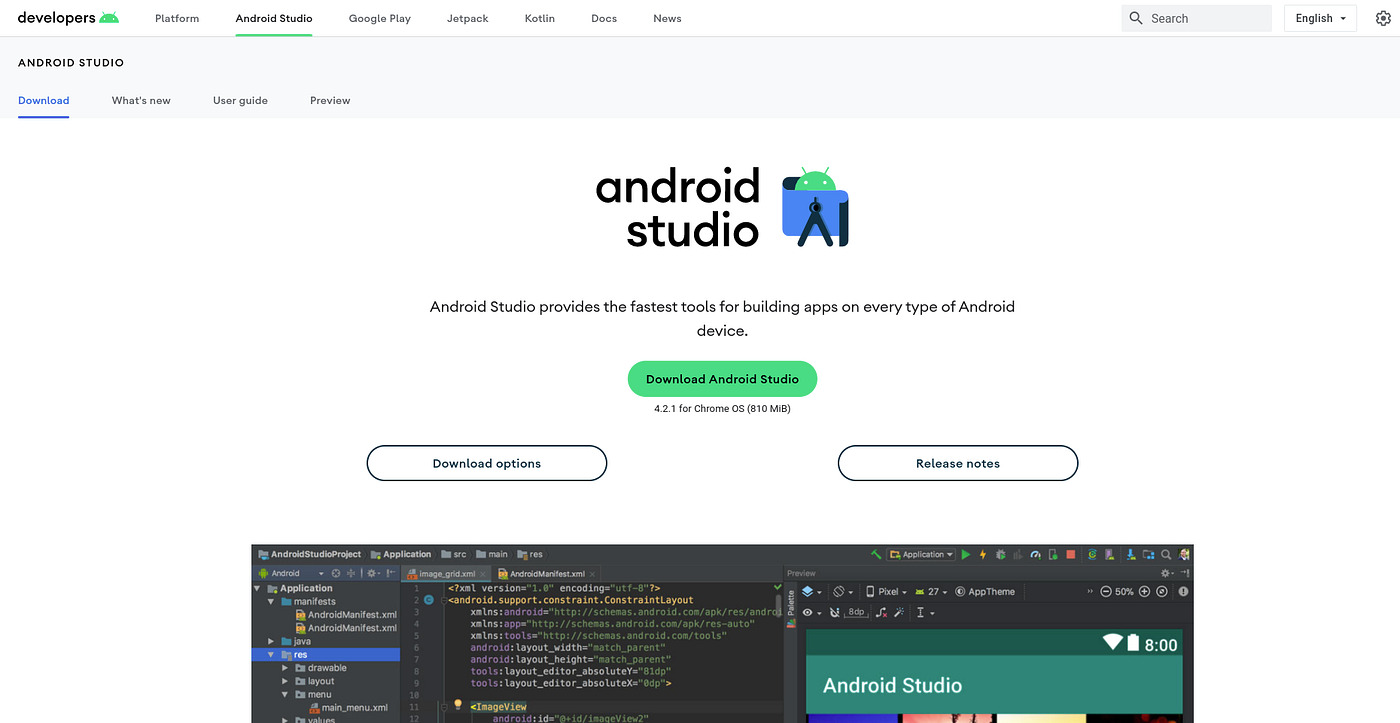
 and its updates requires a reliable network. If your Chromebook meets these criteria, you’re ready to install and run Android Studio efficiently.

Setup Guide

  1. Open your Chromebook.
  2. Go to the Google Play Store.
  3. Search for "Android Studio."
  4. Click "Install."
  5. Wait for the installation to complete.
  6. Open Android Studio from your app drawer.
  7. Follow the on-screen setup wizard.
  8. Choose your settings and click "Next."
  9. Download any required components.
  10. Finish the setup and start coding!

Effective Usage Tips

Optimize Performance: Close unnecessary tabs and apps. Chromebooks have limited resources, so freeing up memory helps Android Studio run smoother.

Use External Storage: Save projects on an external drive or cloud storage. This keeps your Chromebook's internal storage free for other tasks.

Enable Linux (Beta): Activate Linux (Beta) from your Chromebook settings. This allows you to install and run Android Studio efficiently.

Keyboard Shortcuts: Learn and use shortcuts like Ctrl + Space for code completion and Alt + Enter for quick fixes. These save time and improve productivity.

Update Regularly: Keep both your Chromebook and Android Studio updated. Updates often include performance improvements and new features.

Customize IDE: Adjust the theme, font size, and layout to your liking. A comfortable setup makes coding more enjoyable and less straining on your eyes.

Use Emulators Wisely: Emulators can be resource-heavy. Use physical devices for testing when possible, or configure emulators with lower specs to save resources.

Backup Frequently: Regularly back up your projects. Use version control systems like Git to keep track of changes and avoid data loss.

Monitor System Resources: Keep an eye on your Chromebook’s CPU and memory usage. Tools like System Monitor can help you identify and close resource-hogging processes.

Stay Organized: Keep your project files and directories well-organized. This makes it easier to navigate and manage your codebase.

Leverage Plugins: Install useful plugins like ADB Idea for quick device actions or ButterKnife Zelezny for view binding. Plugins can streamline your workflow.

Practice Debugging: Get comfortable with Android Studio’s debugging tools. Set breakpoints, inspect variables, and step through code to find and fix issues efficiently.

Read Documentation: Familiarize yourself with Android Studio’s documentation. Knowing where to find information can save you time when you encounter problems.

Join Communities: Participate in forums and groups like Stack Overflow or Reddit. Sharing knowledge and asking questions can provide valuable insights and solutions.

Troubleshooting Common Problems

App crashes often? Clear cache and data in settings. Still crashing? Reinstall the app.

Battery drains quickly? Lower screen brightness, close unused apps, and disable background data.

Wi-Fi not connecting? Restart router and device. Forget network, then reconnect.

Bluetooth issues? Turn Bluetooth off and on. Unpair and re-pair devices.

Storage full? Delete unused apps, clear cache, and move files to cloud storage.

Slow performance? Restart device, close background apps, and update software.

Screen unresponsive? Restart device. If problem persists, check for screen damage.

App not updating? Clear cache of Google Play Store. Ensure enough storage space.

Overheating? Avoid using device while charging. Close heavy apps and games.

Camera not working? Restart device. Clear camera app cache and data.

Privacy and Security Tips

When using Android Studio on a Chromebook, user data is crucial. Google ensures data encryption both in transit and at rest. To maintain privacy, always update your software to patch vulnerabilities. Use strong passwords and enable two-factor authentication for added security. Avoid public Wi-Fi or use a VPN to protect your connection. Regularly review app permissions and limit access to sensitive information. Backup your data frequently to avoid loss. By following these steps, you can keep your data secure while using Android Studio on your Chromebook.

Comparing Alternatives

Pros of Android Studio on Chromebook:

  1. Portability: Chromebooks are lightweight and easy to carry.
  2. Cost: Generally cheaper than many laptops.
  3. Battery Life: Often longer-lasting compared to traditional laptops.
  4. Integration: Seamless with Google services.
  5. Security: Regular updates and built-in virus protection.

Cons of Android Studio on Chromebook:

  1. Performance: May struggle with heavy tasks due to limited hardware.
  2. Storage: Often limited, which can be a problem for large projects.
  3. Compatibility: Not all Chromebooks support Android Studio.
  4. Offline Use: Limited functionality without internet access.
  5. Customization: Less flexible compared to traditional laptops.

Alternatives:

  1. Windows Laptop:

    • Pros: More powerful hardware, extensive software compatibility, customizable.
    • Cons: Generally more expensive, shorter battery life.
  2. MacBook:

    • Pros: High performance, excellent build quality, great for iOS development.
    • Cons: Expensive, limited to macOS.
  3. Linux Laptop:

    • Pros: Highly customizable, great for developers, often more affordable.
    • Cons: Steeper learning curve, software compatibility issues.
  4. Cloud-Based IDEs:

    • Pros: Accessible from any device with internet, no need for powerful hardware.
    • Cons: Requires constant internet connection, potential latency issues.

App crashes often? Clear cache and data in settings. Still crashing? Reinstall the app.

Battery drains quickly? Lower screen brightness, close unused apps, and disable background data.

Wi-Fi not connecting? Restart router and device. Forget network, then reconnect.

Bluetooth issues? Turn Bluetooth off and on. Unpair and re-pair devices.

Storage full? Delete unused apps, clear cache, and move files to cloud storage.

Slow performance? Restart device, close background apps, and update software.

Screen unresponsive? Restart device. If problem persists, check for screen damage.

App not updating? Clear cache of Google Play Store. Ensure enough storage space.

Overheating? Avoid using device while charging. Close heavy apps and games.

Camera not working? Restart device. Clear camera app cache and data.

Final Thoughts on Using Android Studio on Chromebook

Using Android Studio on a Chromebook is a game-changer for developers. Chromebooks, known for their simplicity and speed, now offer a robust platform for app development. Setting up Android Studio is straightforward, thanks to Linux (Beta) support. Once installed, developers can access all the features they need, from code editing to emulator testing.

Performance on Chromebooks is impressive, especially on models with Intel processors and ample RAM. The cloud-based nature of Chromebooks also means your work is always backed up and accessible. This setup is perfect for both beginners and seasoned developers looking for a portable, efficient development environment.

In short, if you’re into Android development, using Android Studio on a Chromebook is a solid choice. It combines the best of both worlds: the power of Android Studio and the convenience of a Chromebook.

Can you run Android Studio on a Chromebook?

Yes, you can! Whether you're deploying your Android app directly from ChromeOS using Android Studio on your Chromebook or from another device, you can use Android Debug Bridge to deploy and debug your app.

Do all Android apps work on Chromebooks?

Most do! Chromebooks run a full version of the Android framework, so your app is likely already running on ChromeOS devices. This means you can take your single Android APK and scale it to work on any ChromeOS device, offering more immersive experiences on bigger screens.

Is there an Android emulator for Chromebooks?

Yep! MEmu Android emulator is great for playing Android games on your Chromebook. It offers exciting features that give users more control over gameplay, high-end graphics, and access to apps without a controller.

How do you install Android Studio on a Chromebook?

First, enable Linux (Beta) on your Chromebook. Then, download the Android Studio package from the official website. Open the Terminal, navigate to the download location, and install it using the command sudo dpkg -i android-studio-ide-*.deb.

Can you develop Android apps on a Chromebook?

Absolutely! With Android Studio installed, you can develop, test, and debug Android apps right on your Chromebook. It's a handy setup for developers on the go.

What are the system requirements for running Android Studio on a Chromebook?

Your Chromebook should have at least 4GB of RAM and a decent processor. Enabling Linux (Beta) is also necessary. More powerful Chromebooks will offer a smoother experience.

Are there any limitations to using Android Studio on a Chromebook?

While most features work fine, some advanced features might be limited due to hardware constraints. However, for most development tasks, Android Studio on a Chromebook works just great.

Was this page helpful?