
Introduction
Android Studio is a powerful integrated development environment (IDE) for Android app development. It provides a comprehensive set of tools and features to help developers create, test, and deploy Android applications efficiently. One of the essential tasks in Android development is managing projects, including deleting them when necessary. This article will cover the process of deleting projects in Android Studio, highlighting the steps and best practices to ensure a smooth and secure experience.
Understanding Project Management in Android Studio
Before diving into the process of deleting projects, understanding how project management works in Android Studio is crucial. Here are some key points:
Project Structure
Android Studio organizes projects into a hierarchical structure. Each project consists of modules, which can be either Android app modules or library modules. The project structure also includes the Gradle build files, which define dependencies and build configurations.
Project Files
A typical Android Studio project includes various files such as AndroidManifest.xml, build.gradle, and res folders containing resources like layouts and drawables.
Version Control
Android Studio supports version control systems like Git, allowing developers to manage different versions of their codebase.
Why Delete a Project?
There are several reasons why you might need to delete an Android Studio project:
- Outdated or Incomplete Work: Sometimes, projects are started but never completed or are outdated and no longer relevant.
- Testing Purposes: Creating temporary projects for testing purposes is common in development.
- Resource Management: Deleting unused projects can help manage disk space and reduce clutter.
- Security: Removing old projects can eliminate potential security risks if they contain sensitive information.
Steps to Delete a Project in Android Studio
Deleting a project in Android Studio is a straightforward process. Here are the steps:
Open Android Studio
Launch Android Studio from your desktop or start menu.
Navigate to the Project Directory
Open the File Explorer or Finder and navigate to the directory where your project is located.
Locate the Project Directory
Identify the folder that contains your project files. This folder typically has the same name as your project.
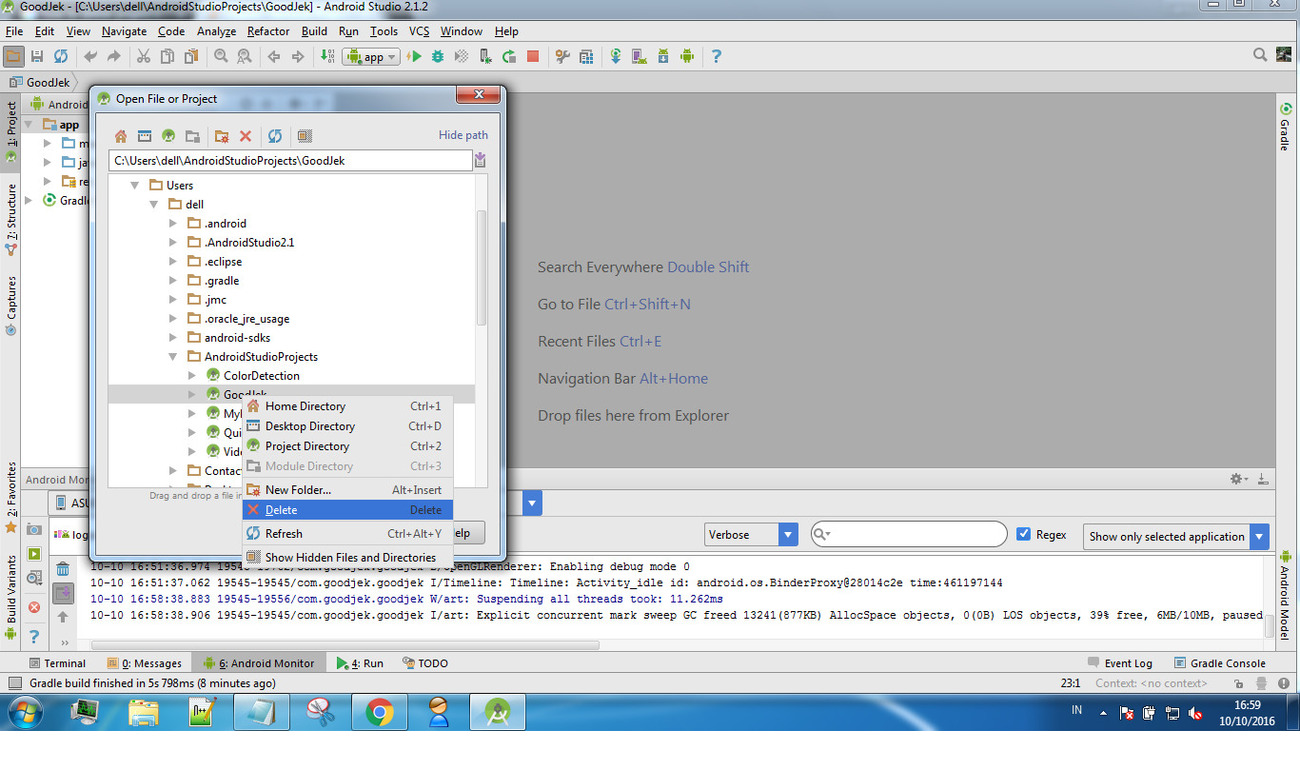
Delete the Project Folder
Right-click on the project folder and select "Delete" or press the "Delete" key. Confirm that you want to delete the folder.
Remove from Recent Projects List
If you want to remove the project from the recent projects list in Android Studio, go to File > Settings (or Preferences on macOS) > System Settings > Recent Projects and Solutions. Find your project in the list and click the "Remove" button next to it.
Clear Cache and Data (Optional)
If you're concerned about any residual data, you can clear the cache and data for Android Studio. Go to File > Settings (or Preferences on macOS) > System Settings > Caches. Find the cache related to your project and click "Clear Cache".
Best Practices for Deleting Projects
While deleting a project is relatively simple, there are some best practices you should follow:
Backup Important Data
Before deleting any project, make sure you have backed up any important data or files that you might need in the future. This includes source code, assets, and any other relevant files.
Check Dependencies
If your project has dependencies on other modules or libraries, ensure that these dependencies are removed or updated appropriately after deleting the project.
Close All Instances of Android Studio
To avoid any conflicts or errors during deletion, close all instances of Android Studio before proceeding with deleting the project folder.
Verify Removal from Version Control Systems
If your project is managed using a version control system like Git, verify that the project has been removed from the repository by checking the repository history.
Clean Up Disk Space
After deleting a project, clean up any remaining temporary files or cache data to free up disk space.
Advanced Techniques: Factory Reset
In some cases, you might need to perform a factory reset on your Android device if it's been used for testing purposes or if you're experiencing issues that require a clean slate. Here’s how you can do it:
Open Settings App
On your Android device, go to the Settings app.
Navigate to System Settings
Scroll down and find the "System" or "System Settings" option and tap on it.
Select Advanced Options
Look for an option like "Reset options" or "Advanced reset options" and tap on it.
Choose Factory Reset
Select the option to perform a factory reset. This will erase all data on your device, so make sure you have backed up any important information beforehand.
Confirm Reset
Confirm that you want to perform the factory reset by following the on-screen instructions.
Additional Tips
- Regular Maintenance: Regularly cleaning up your workspace by deleting unused projects can help prevent clutter and improve productivity.
- Version Control: Using version control systems like Git helps track changes and revert back to previous versions if needed.
- Backup Data: Always backup important data before making any significant changes to your projects or devices.
By adhering to these guidelines and best practices, you'll be able to manage your Android Studio projects effectively, ensuring that your development process remains smooth and efficient.