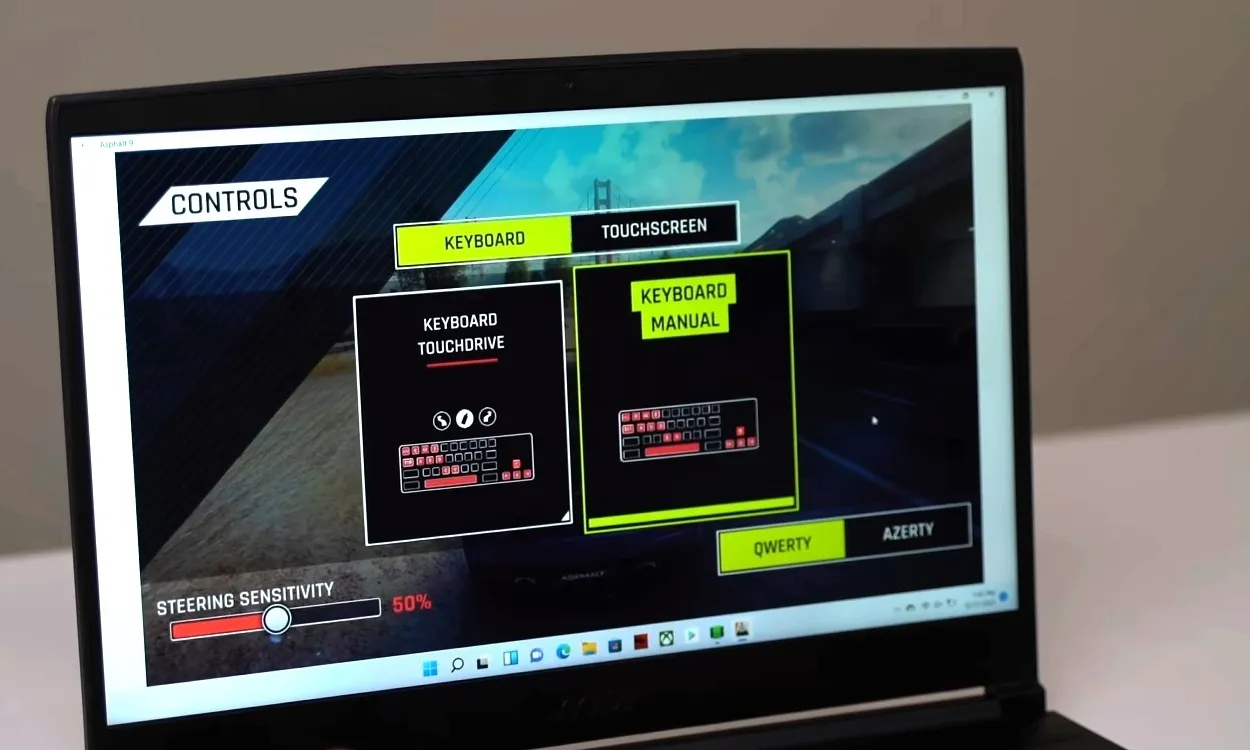
Windows 11 Android Emulator: Your Complete Guide

Android Emulator
windows-11-android-emulator-your-complete-guide
Source: Beebom.com

Introduction to Android Emulators on Windows 11

Overview of Android Emulators:

Android emulators are software programs that allow users to run Android apps on non-Android devices. Think of them as virtual Android phones or tablets that live inside your computer. They mimic the Android operating system, letting you use apps, play games, and test software without needing an actual Android device.

Why Use Android Emulators on Windows 11:

Using Android emulators on Windows 11 has several perks. For starters, gamers can enjoy mobile games on a bigger screen with better controls. Developers can test apps in different environments without needing multiple devices. Plus, it’s handy for anyone who wants to use mobile-only apps on their computer. Windows 11’s powerful hardware and smooth interface make it an ideal platform for running these emulators efficiently.

Key Takeaways:

  • Android emulators let you run mobile apps and games on your Windows 11 computer, making it feel like you have a virtual Android phone right on your PC.
  • Using tools like BlueStacks or the Windows Subsystem for Android™, you can easily enjoy mobile apps, test software, and play games on a bigger screen with better controls.

Official Methods to Run Android Apps on Windows 11

Windows Subsystem for Android™️:

Windows Subsystem for Android™️ (WSA) is a feature in Windows 11 that lets you run Android apps natively. It integrates seamlessly with the Windows operating system, meaning you can open Android apps just like any other Windows app. This feature makes it easy to switch between Android and Windows apps without any hassle.

Installing the Amazon Appstore:

To get started with WSA, you’ll need to install the Amazon Appstore. Here’s how:

  1. Open the Microsoft Store on your Windows 11 device.
  2. Search for "Amazon Appstore" and click "Install."
  3. Follow the on-screen instructions to set up the Appstore.

Once installed, you can browse, download, and run Android apps directly from the Amazon Appstore. It’s a straightforward way to access a wide range of apps without needing extra software.

Unofficial Methods: Using Third-Party Emulators

Popular Android Emulators

When it comes to third-party Android emulators, a few names stand out. BlueStacks and GameLoop are among the most popular. BlueStacks is known for its user-friendly interface and broad compatibility with various Android apps. GameLoop, on the other hand, is favored by gamers for its optimized performance in running mobile games on a PC.

Installing BlueStacks on Windows 11

Step-by-Step Guide to Install BlueStacks:

  1. Download BlueStacks: Visit the official BlueStacks website and download the installer.
  2. Run the Installer: Open the downloaded file and follow the on-screen instructions.
  3. Complete Installation: Once installed, launch BlueStacks.

Configuring and Using BlueStacks:

  1. Sign In: Use your Google account to sign in.
  2. Customize Settings: Adjust settings like CPU allocation, RAM usage, and resolution for better performance.
  3. Install Apps: Use the built-in Google Play Store to download and install Android apps.

Installing GameLoop on Windows 11

Step-by-Step Guide to Install GameLoop:

  1. Download GameLoop: Head to the GameLoop website and download the installer.
  2. Run the Installer: Execute the downloaded file and follow the setup instructions.
  3. Complete Installation: Open GameLoop after installation.

Configuring and Using GameLoop:

  1. Sign In: Log in with your Google account.
  2. Optimize Settings: Tweak settings for CPU, RAM, and graphics to enhance performance.
  3. Install Games: Use the GameLoop interface to find and install your favorite Android games.

Setting Up and Configuring Emulators

System Requirements

Minimum and Recommended System Requirements:

  • Minimum:
    • OS: Windows 7 or higher
    • CPU: Intel or AMD Processor
    • RAM: At least 2GB
    • Storage: 5GB free disk space
  • Recommended:
    • OS: Windows 10 or 11
    • CPU: Intel or AMD Multi-Core Processor with Single Thread benchmark score > 1000
    • RAM: 8GB or more
    • Storage: SSD with 10GB free disk space

Enabling Virtualization

How to Enable Virtualization in BIOS/UEFI Settings:

  1. Restart Your PC: Enter BIOS/UEFI by pressing the designated key (usually F2, F10, DEL).
  2. Find Virtualization Settings: Look for settings like Intel VT-x, AMD-V, or SVM.
  3. Enable Virtualization: Turn on the virtualization feature.
  4. Save and Exit: Save changes and exit BIOS/UEFI.

Configuring Emulator Settings

Adjusting Performance Settings for Optimal Use:

  • CPU and RAM Allocation: Allocate more CPU cores and RAM for better performance.
  • Graphics Settings: Choose the appropriate graphics mode (OpenGL, DirectX) based on your system.

Customizing Controls and Display Settings:

  • Control Mapping: Customize keyboard and mouse controls for a better gaming experience.
  • Resolution and DPI: Adjust resolution and DPI settings to match your monitor for clearer visuals.

Troubleshooting Common Issues

Performance Issues

If your emulator's running slow, there are a few tricks to speed things up. First, check if your computer meets the recommended system requirements. Sometimes, just having enough RAM or a better CPU can make a huge difference. Also, make sure virtualization is enabled in your BIOS/UEFI settings. This allows your computer to better handle the emulator.

Another tip is to close unnecessary background applications. Programs running in the background can hog resources, making your emulator lag. Adjusting the emulator's settings can also help. Lowering the resolution or reducing the number of CPU cores allocated to the emulator can improve performance. Lastly, keep your graphics drivers up to date. Outdated drivers can cause all sorts of performance issues.

Compatibility Issues

Running into problems with certain apps? It might be a compatibility issue. Some apps just don't play well with emulators. One way to tackle this is by trying different emulators. If an app doesn't work on BlueStacks, it might work on GameLoop or another emulator.

Sometimes, the issue lies with the app itself. Make sure you're using the latest version of the app. Developers often release updates to fix bugs and improve compatibility. If the app still won't install, try clearing the emulator's cache or reinstalling the emulator. This can resolve many installation problems.

Network and Connectivity Issues

Having trouble connecting to the internet within your emulator? First, check your computer's internet connection. If your computer's offline, your emulator will be too. If the connection's fine, the issue might be with the emulator's network settings.

Go into the emulator's settings and make sure it's set to use your computer's network. Sometimes, switching the network mode from NAT to Bridged can solve connectivity issues. Also, ensure your firewall isn't blocking the emulator. Adding the emulator to your firewall's list of allowed applications can help.

Advanced Tips and Tricks

Using Multiple Emulators

Running multiple emulators at once can be handy, especially for testing apps. However, it can also be a resource hog. To manage this, allocate resources wisely. Don't give each emulator more CPU cores or RAM than necessary. Monitor your system's performance and adjust settings as needed.

Using an emulator manager can also help. Some emulators come with built-in managers that let you run multiple instances efficiently. This can save you the hassle of manually configuring each instance.

Integrating with Development Tools

If you're into app development, emulators can be a lifesaver. They let you test your apps without needing a physical device. Connecting your emulator to Android Studio is straightforward. Just go to the AVD Manager in Android Studio and select your emulator. This allows you to run and debug your apps directly on the emulator.

You can also use other development tools like ADB (Android Debug Bridge). This tool lets you communicate with your emulator from the command line, making it easier to install apps, transfer files, and more.

Security Considerations

While emulators are great, they can pose security risks if you're not careful. Always download emulators from official websites to avoid malware. Be cautious when installing apps from unknown sources. Stick to trusted app stores like Google Play or the Amazon Appstore.

Regularly update your emulator and apps to patch security vulnerabilities. Also, consider using antivirus software to scan for potential threats. By following these practices, you can enjoy the benefits of emulators without compromising your system's security.

Final Thoughts on Android Emulators

All in all, Android emulators on Windows 11 offer a fantastic way to enjoy mobile apps on a bigger screen, whether you're a gamer, developer, or just curious. Official methods like Windows Subsystem for Android™️ and the Amazon Appstore make it easy, while third-party options like BlueStacks and GameLoop provide flexibility. Remember, enabling virtualization and keeping your system updated can boost performance. Troubleshooting common issues like lag and compatibility can usually be solved with a few tweaks. Stay safe by downloading from trusted sources and keeping everything updated. Emulators truly bring the best of both worlds right to your computer!

Feature Overview

The Windows 11 Android Emulator lets users run Android apps on their PCs. It mimics an Android device, enabling access to the Google Play Store. Users can download, install, and use apps just like on a smartphone. This emulator supports keyboard and mouse inputs, enhancing the experience. It also allows multitasking, so multiple apps can run simultaneously. Developers can test apps in a controlled environment, ensuring compatibility across devices. This feature bridges the gap between mobile and desktop platforms, offering a seamless integration.

Necessary Requirements and Compatibility

To run the Windows 11 Android Emulator, your device needs to meet specific requirements. First, ensure your computer has Windows 11 installed. Your system should have at least an Intel Core i3 or AMD Ryzen 3000 series processor. For memory, a minimum of 8GB RAM is necessary, though 16GB is recommended for smoother performance.

Your device must support Hyper-V and Virtual Machine Platform. To check this, go to Control Panel > Programs > Turn Windows features on or off and ensure both options are enabled. Additionally, your system should have SSD storage for faster read/write speeds.

Graphics-wise, an Intel UHD Graphics 620 or better is required. Make sure your GPU drivers are up to date. For display, a 1080p resolution or higher is ideal.

Your device should also have Wi-Fi 6 or a stable internet connection for downloading apps and updates. Lastly, ensure you have the latest Windows updates installed by going to Settings > Update & Security > Windows Update.

Meeting these requirements ensures your device can handle the Windows 11 Android Emulator efficiently, providing a seamless experience.

Feature Setup Guide

  1. Open Microsoft Store on your Windows 11 device.
  2. Search for "Windows Subsystem for Android" in the search bar.
  3. Click "Install" to download the subsystem.
  4. Open Settings on your computer.
  5. Navigate to "Apps" and then select "Optional features."
  6. Scroll down and click on "More Windows features."
  7. Find "Virtual Machine Platform" and check the box next to it.
  8. Click "OK" and restart your computer.
  9. After rebooting, open the Microsoft Store again.
  10. Search for "Amazon Appstore" and install it.
  11. Open the Amazon Appstore and sign in with your Amazon account.
  12. Browse or search for Android apps and install them.
  13. Launch installed Android apps from the Start menu or search bar.

Done! Your Windows 11 device now runs Android apps.

Effective Usage Tips

Keep your system updated: Ensure Windows 11 and all drivers are current. This helps the emulator run smoothly.

Allocate enough resources: Assign sufficient RAM and CPU to the emulator. This prevents lag and improves performance.

Use SSD storage: Install the emulator on an SSD for faster load times and better overall speed.

Enable virtualization: Turn on virtualization in your BIOS settings. This boosts the emulator's efficiency.

Optimize graphics settings: Adjust the graphics settings within the emulator for a balance between performance and visual quality.

Test apps regularly: Frequently test your apps to catch bugs early. This saves time and effort later.

Backup your data: Regularly backup your emulator data to avoid losing important information.

Use keyboard shortcuts: Familiarize yourself with keyboard shortcuts to navigate the emulator quickly.

Monitor resource usage: Keep an eye on resource usage through Task Manager. This helps identify and fix performance issues.

Stay organized: Keep your files and projects well-organized within the emulator. This makes development more efficient.

Troubleshooting Common Issues

App crashes often? Try updating the emulator and your graphics drivers. If that doesn't work, lower the emulator's resolution or allocate more RAM.

Experiencing slow performance? Close unnecessary background apps. Increase the CPU and RAM allocation in the emulator settings.

Keyboard not working? Check if the emulator's keyboard input is enabled. Restart the emulator if needed.

Network issues? Ensure your computer's internet connection is stable. Restart the emulator and check network settings within it.

App not installing? Verify the APK file isn't corrupted. Clear the emulator's cache and try again.

Screen stuck or frozen? Force stop the emulator and restart it. If the problem persists, reinstall the emulator.

Audio problems? Check the emulator's audio settings. Ensure your computer's sound settings are correct.

Graphics glitches? Update your graphics drivers. Adjust the emulator's graphics settings to a lower quality.

Can't sign in to Google Play? Clear the Google Play Store cache within the emulator. Re-add your Google account if necessary.

Sync issues? Ensure your Google account sync settings are correct. Restart the emulator to refresh the sync process.

Privacy and Security Tips

Using the Windows 11 Android Emulator involves several security and privacy considerations. User data is handled with care, but it's crucial to take extra steps to protect your information. Always download apps from trusted sources like the Google Play Store to avoid malware. Regularly update both the emulator and apps to patch any vulnerabilities. Use strong passwords and enable two-factor authentication for added security. Be cautious with app permissions; only grant access to necessary features. Consider using a VPN to encrypt your internet connection, ensuring your data remains private. Finally, regularly clear cache and delete unused apps to minimize data exposure.

Comparing Alternatives

Pros of Windows 11 Android Emulator:

  • Integration: Seamlessly integrates with Windows 11, making it easy to switch between apps.
  • Performance: Generally fast and responsive, especially on newer hardware.
  • Compatibility: Supports a wide range of Android apps.
  • Security: Benefits from Windows 11's security features.

Cons of Windows 11 Android Emulator:

  • Resource-Intensive: Requires significant system resources, which can slow down older PCs.
  • Limited Customization: Fewer customization options compared to other emulators.
  • App Availability: Not all Android apps are optimized for this emulator.

Alternatives:

  • BlueStacks:

    • Pros: Highly customizable, supports a wide range of apps, good performance.
    • Cons: Can be resource-heavy, occasional ads.
  • NoxPlayer:

    • Pros: Lightweight, easy to use, good for gaming.
    • Cons: Limited features compared to BlueStacks, occasional bugs.
  • Genymotion:

    • Pros: Excellent for developers, supports various Android versions.
    • Cons: Requires VirtualBox, not ideal for casual users.
  • LDPlayer:

    • Pros: Optimized for gaming, lightweight, good performance.
    • Cons: Limited non-gaming features, occasional compatibility issues.

App crashes often? Try updating the emulator and your graphics drivers. If that doesn't work, lower the emulator's resolution or allocate more RAM.

Experiencing slow performance? Close unnecessary background apps. Increase the CPU and RAM allocation in the emulator settings.

Keyboard not working? Check if the emulator's keyboard input is enabled. Restart the emulator if needed.

Network issues? Ensure your computer's internet connection is stable. Restart the emulator and check network settings within it.

App not installing? Verify the APK file isn't corrupted. Clear the emulator's cache and try again.

Screen stuck or frozen? Force stop the emulator and restart it. If the problem persists, reinstall the emulator.

Audio problems? Check the emulator's audio settings. Ensure your computer's sound settings are correct.

Graphics glitches? Update your graphics drivers. Adjust the emulator's graphics settings to a lower quality.

Can't sign in to Google Play? Clear the Google Play Store cache within the emulator. Re-add your Google account if necessary.

Sync issues? Ensure your Google account sync settings are correct. Restart the emulator to refresh the sync process.

H2: Final Thoughts on Windows 11 Android Emulator

Windows 11 Android Emulator offers a seamless way to run Android apps on your PC. It’s user-friendly, making it accessible for both tech-savvy users and beginners. With its integration into the Windows ecosystem, you get the best of both worlds—Android apps and Windows functionality. Performance is generally smooth, though it may vary depending on your system specs. Regular updates ensure it stays current with the latest Android features. For developers, it’s a handy tool for testing apps without needing a separate Android device. Gamers can enjoy mobile games on a larger screen with better controls. Overall, it’s a versatile addition to Windows 11, enhancing productivity and entertainment options. If you’re looking to bridge the gap between mobile and desktop, this emulator is a solid choice. Give it a try and see how it fits into your workflow.

Do Android emulators work on Windows 11?

Yes, you can run Android apps on Windows 11 using an Android emulator. These tools help you use your favorite phone apps on your computer.

Which Android emulator is best for Windows 11?

Popular choices include BlueStacks, NoxPlayer, and LDPlayer. Each has unique features, so try a few to see which one suits you best.

Is it free to use Android emulators on Windows 11?

Most Android emulators offer free versions with basic features. Some, like BlueStacks, have premium versions with extra perks.

Can I play mobile games on Windows 11 using an emulator?

Absolutely! Many gamers use emulators to play mobile games on a bigger screen. BlueStacks and LDPlayer are especially popular for gaming.

Are there any risks in using Android emulators on Windows 11?

While generally safe, downloading emulators from unofficial sites can pose security risks. Always download from the official website to avoid malware.

Do I need a powerful computer to run an Android emulator on Windows 11?

Not necessarily, but a decent processor and enough RAM (at least 4GB) will ensure smoother performance. High-end games might need better specs.

How do I install an Android emulator on Windows 11?

Download the emulator from its official site, run the installer, and follow the on-screen instructions. Once installed, you can start downloading and using Android apps.

Was this page helpful?