
Introduction
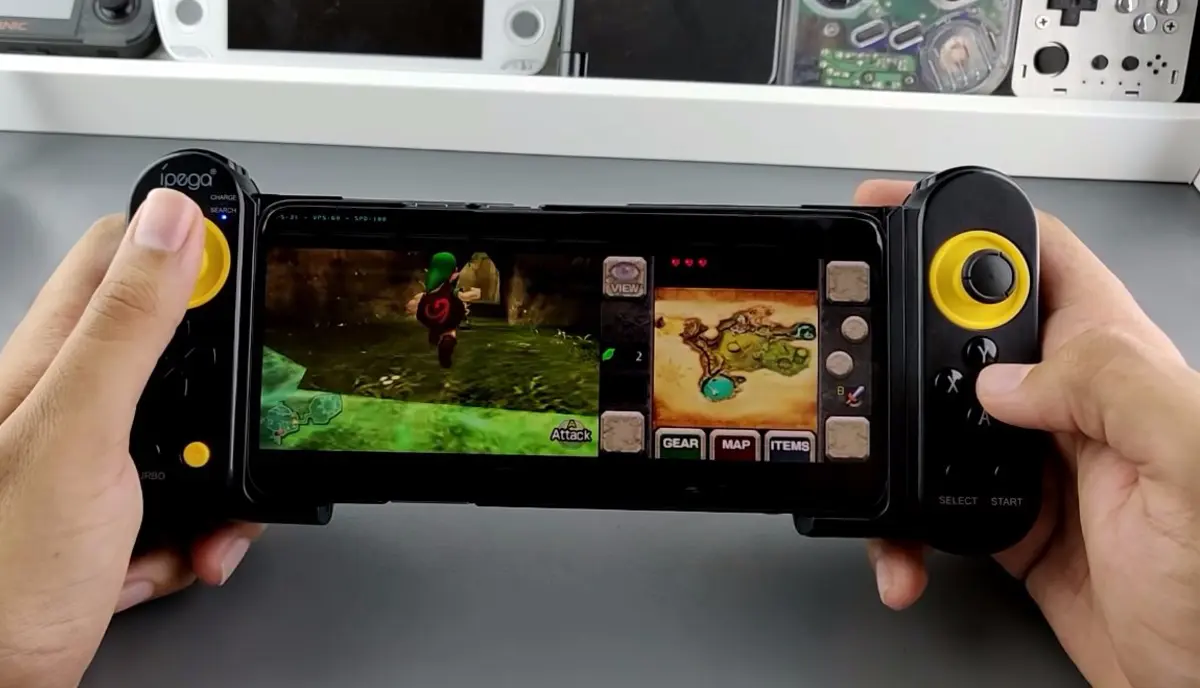
Using an Android emulator to play games or run applications offers a fantastic way to experience Android on various devices, including those you may not own. However, ensuring that an emulator supports game controllers presents a significant challenge, essential for many gaming experiences. This guide walks you through setting up and using game controllers with your Android emulator, covering both technical aspects and practical steps.
Understanding Game Controller Support
Before diving into the setup process, understanding the basics of how game controllers work with Android emulators is crucial. The Android framework provides APIs for detecting and processing user input from game controllers, enabling developers to create applications that handle multiple types of controllers seamlessly.
Key Features
- Controller Detection: The emulator must detect when a game controller connects. This involves using APIs like
InputManagerCompatto track the addition, change, or removal of game controllers. - Controller Capabilities: The emulator should query the capabilities of a game controller, such as its button layout and joystick movements.
- Motion Events: The emulator needs to recognize incoming motion events from the game controller, including D-pad presses, gamepad button presses, joystick movements, and analog trigger presses.
Setting Up Your Environment
To start using a game controller with your Android emulator, ensure your development environment is properly configured. Here’s a step-by-step guide:
1. Install Android Studio
First, install Android Studio on your computer. This is the primary tool for developing Android applications and running the emulator.
2. Set Up Your Emulator
- Launch Android Studio: Open Android Studio and create a new project or open an existing one.
- Create or Select an AVD: Go to
Tools>AVD Managerand create a new AVD (Android Virtual Device) or select an existing one. - Configure the AVD: Ensure the AVD is configured to use a hardware profile that supports USB devices. This is crucial for connecting gamepads via USB.
3. Install the Game Controller
You can use either a wired or wireless game controller. This guide focuses on both types:
- Wired Gamepads: Typically connected via USB, requiring no additional setup beyond plugging them into your computer.
- Wireless Gamepads: Usually come with a USB wireless dongle and may require additional configuration to work with the emulator.
Configuring Wireless Gamepads
Configuring wireless gamepads can be more complex due to the need for USB device recognition by the emulator. Here’s how you can do it:
1. Identify Your Gamepad
First, identify the USB vendor and product IDs of your gamepad using lsusb in the terminal:
sh
lsusb
This command lists all connected USB devices, including your gamepad. Note down the vendor ID (idVendor) and product ID (idProduct).
2. Create Udev Rules
To allow the emulator to recognize your gamepad, create a udev rule. Udev rules manage device permissions and actions.
-
Navigate to Udev Rules Directory:
sh
sudo nano /etc/udev/rules.d/10-local.rules -
Add Udev Rule:
sh
SUBSYSTEM!="usb", GOTO="end_skip_usb"
ATTRS{idVendor}=="", ATTRS{idProduct}==" ", TAG+="uaccess"
LABEL="end_skip_usb"
Replace <YOUR_VENDOR_ID> and <YOUR_PRODUCT_ID> with the actual values from lsusb.
-
Refresh Udev Rules:
sh
sudo udevadm control –reload-rules -
Plug and Unplug Gamepad:
Plug in your gamepad and unplug it. This step refreshes the udev rules. -
Run Emulator with USB Device:
sh
./emulator -avd YOUR_VM -qemu -usb -usbdevice host::
Replace YOUR_VM with the name of your AVD.
Pairing Bluetooth Gamepads
Pairing a Bluetooth gamepad is generally simpler than setting up a wired one but still requires some configuration:
-
Pair Gamepad with Computer:
Follow the manufacturer's instructions to pair your Bluetooth gamepad with your computer. -
Add Gamepad to Emulator:
In the Android Studio AVD Manager, go toEdit>Show Advanced Settings. Under theHardwaresection, selectAdd>Gamepad. -
Configure Gamepad Settings:
In theGamepadsettings, select the paired Bluetooth gamepad from the list of available devices.
Handling Controller Actions
Once your gamepad is connected, handle its actions within your application. Here’s how you can do it:
1. Detecting Controller Actions
To detect controller actions, use the InputManagerCompat interface. This interface provides methods for detecting when a new game controller is added, changed, or removed.
java
import android.hardware.input.InputManagerCompat;
// …
public class GameActivity extends AppCompatActivity {
private InputManagerCompat mInputManager;

@Override
protected void onCreate(Bundle savedInstanceState) {
    super.onCreate(savedInstanceState);
    setContentView(R.layout.activity_game);

    // Get the InputManagerCompat instance
    mInputManager = InputManagerCompat.from(this);

    // Register for input device changes
    mInputManager.registerInputDeviceListener(
            new InputDeviceListener() {
                @Override
                public void onInputDeviceAdded(int deviceId) {
                    Log.d("GameActivity", "New game controller added: " + deviceId);
                }

                @Override
                public void onInputDeviceChanged(int deviceId) {
                    Log.d("GameActivity", "Game controller changed: " + deviceId);
                }

                @Override
                public void onInputDeviceRemoved(int deviceId) {
                    Log.d("GameActivity", "Game controller removed: " + deviceId);
                }
            },
            InputDevice.SOURCE_GAMEPAD
    );
}

// ...
}
2. Querying Controller Capabilities
To query the capabilities of a game controller, use methods like getInputDeviceIds() and getInputDevice().
java
public class GameActivity extends AppCompatActivity {
private InputManagerCompat mInputManager;

@Override
protected void onCreate(Bundle savedInstanceState) {
    super.onCreate(savedInstanceState);
    setContentView(R.layout.activity_game);

    // Get the InputManagerCompat instance
    mInputManager = InputManagerCompat.from(this);

    // Get all connected game controllers
    SparseArray<InputDevice> devices = mInputManager.getInputDevices();
    for (int i = 0; i < devices.size(); i++) {
        InputDevice device = devices.valueAt(i);
        if (device.getSources() == InputDevice.SOURCE_GAMEPAD) {
            Log.d("GameActivity", "Game controller found: " + device.getName());
        }
    }
}

// ...
}
3. Handling Motion Events
To handle motion events from the game controller, override methods like onGenericMotionEvent() in your activity.
java
public class GameActivity extends AppCompatActivity {
private InputManagerCompat mInputManager;

@Override
protected void onCreate(Bundle savedInstanceState) {
    super.onCreate(savedInstanceState);
    setContentView(R.layout.activity_game);

    // Get the InputManagerCompat instance
    mInputManager = InputManagerCompat.from(this);

    // Register for motion events
    mInputManager.registerInputDeviceListener(
            new InputDeviceListener() {
                @Override
                public void onGenericMotionEvent(MotionEvent event) {
                    // Handle motion events here
                    Log.d("GameActivity", "Motion event received: " + event);
                }
            },
            InputDevice.SOURCE_GAMEPAD
    );
}

// ...
}
Additional Tips and Tricks
Here are some additional tips and tricks to help you get the most out of using game controllers with your Android emulator:
1. Using Multiple Controllers
If you need to support multiple controllers simultaneously, use the InputManagerCompat interface to detect and handle multiple devices.
java
public class GameActivity extends AppCompatActivity {
private InputManagerCompat mInputManager;

@Override
protected void onCreate(Bundle savedInstanceState) {
    super.onCreate(savedInstanceState);
    setContentView(R.layout.activity_game);

    // Get the InputManagerCompat instance
    mInputManager = InputManagerCompat.from(this);

    // Register for input device changes
    mInputManager.registerInputDeviceListener(
            new InputDeviceListener() {
                @Override
                public void onInputDeviceAdded(int deviceId) {
                    Log.d("GameActivity", "New game controller added: " + deviceId);
                }

                @Override
                public void onInputDeviceChanged(int deviceId) {
                    Log.d("GameActivity", "Game controller changed: " + deviceId);
                }

                @Override
                public void onInputDeviceRemoved(int deviceId) {
                    Log.d("GameActivity", "Game controller removed: " + deviceId);
                }
            },
            InputDevice.SOURCE_GAMEPAD
    );
}

// ...
}
2. Customizing Controller Layouts
Customize the layout of your gamepad by using different button mappings or joystick configurations.
java
public class GameActivity extends AppCompatActivity {
private InputManagerCompat mInputManager;

@Override
protected void onCreate(Bundle savedInstanceState) {
    super.onCreate(savedInstanceState);
    setContentView(R.layout.activity_game);

    // Get the InputManagerCompat instance
    mInputManager = InputManagerCompat.from(this);

    // Set custom button mappings
    mInputManager.setCustomButtonMapping(
            new int[] { BUTTON_A, BUTTON_B },
            new int[] { KEYCODE_A, KEYCODE_B }
    );

    // Set custom joystick configurations
    mInputManager.setCustomJoystickConfiguration(
            new int[] { AXIS_X, AXIS_Y },
            new int[] { 0, 0 }
    );
}

// ...
}
Final Thoughts
Using game controllers with your Android emulator can significantly enhance your gaming experience. By following the steps outlined in this guide, you should be able to set up and use various types of gamepads seamlessly. Whether using a wired or wireless controller, ensuring proper configuration and handling of controller actions is crucial for a smooth gaming experience.
Test your setup thoroughly to ensure everything works as expected. With practice and patience, you'll be able to enjoy a wide range of games on your Android emulator using your favorite gamepads.