
Methods to Uninstall Android Studio on Mac
Uninstalling Android Studio on a Mac involves more than just dragging the application to the Trash. This guide will walk you through three methods: manual uninstallation, using Terminal commands, and utilizing an uninstaller tool.
Method 1: Manual Uninstallation
Step 1: Quit Android Studio
Ensure Android Studio is closed before starting the uninstallation process.
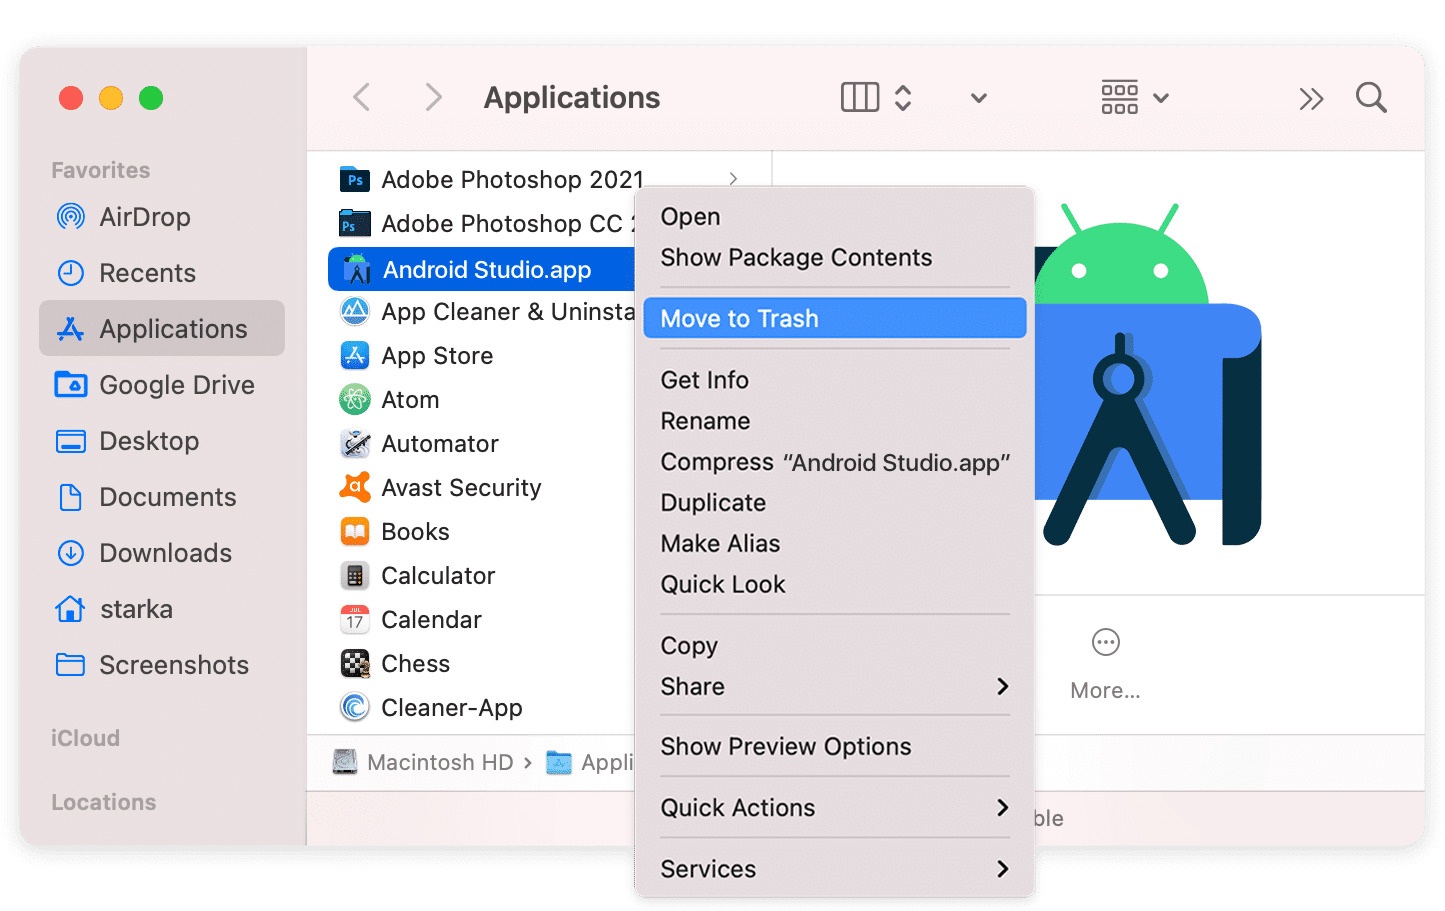
Step 2: Remove Android Studio App
Navigate to the Applications folder, find Android Studio, drag it to the Trash, and empty the Trash.
Step 3: Locate Hidden Files and Folders
Enable visibility of hidden files by opening Terminal and entering:
bash
defaults write com.apple.finder AppleShowAllFiles true
Restart Finder with:
bash
killall Finder
Step 4: Delete Android Studio Related Files and Folders
Navigate to the following paths and delete the mentioned folders:
- ~/Library/Preferences/AndroidStudio
- ~/Library/Application Support/AndroidStudio
- ~/Library/Caches/AndroidStudio
- ~/Library/Logs/AndroidStudio
- ~/Library/Android
- ~/Library/Preferences/com.google.android
- ~/Library/Preferences/com.android
- ~/Library/Application Support/Google/AndroidStudio
- ~/Library/Logs/Google/AndroidStudio
Also, delete project files in the ~/AndroidStudioProjects folder, but be cautious as they may contain important data.
Step 5: Empty the Trash
Empty the Trash to complete the uninstallation process.
Method 2: Using Terminal Commands
Step 1: Delete the Android Studio Application
Open Terminal and type:
bash
rm -rf /Applications/Android\ Studio.app
Step 2: Delete Android Studio’s Plist Files
Remove plist files with:
bash
rm -rf ~/Library/Preferences/AndroidStudio*
rm -rf ~/Library/Preferences/com.google.android.*
rm -rf ~/Library/Preferences/com.android.*
Step 3: Delete Main Plugins
Remove main plugins using:
bash
rm -rf ~/Library/Application\ Support/Google/AndroidStudio*
rm -rf ~/Library/Application\ Support/AndroidStudio*
Step 4: Delete All Logs
Remove logs with:
bash
rm -rf ~/Library/Logs/Google/AndroidStudio*
rm -rf ~/Library/Logs/AndroidStudio*
Step 5: Delete Caches
Remove cache files using:
bash
rm -rf ~/Library/Caches/Google/AndroidStudio*
rm -rf ~/Library/Caches/AndroidStudio*
Step 6: Delete Android SDK Tools
Remove Android SDK tools with:
bash
rm -rf ~/Library/Android*
rm -rf ~/.android
Step 7: Delete Older Versions of Android Studio
Remove older versions if they exist:
bash
rm -rf ~/.AndroidStudio*
Step 8: Delete Gradle Files
Remove Gradle cache files using:
bash
rm -rf ~/.gradle/
Step 9: Delete Projects Created Using Android Studio
Remove project files, but be cautious as this will delete all project data:
bash
rm -rf ~/AndroidStudioProjects
Method 3: Using an Uninstaller Tool
Step 1: Download and Install the Uninstaller Tool
Download and install CleanMyMac X or PowerMyMac.
Step 2: Open the Uninstaller Module
Open the Uninstaller module in CleanMyMac X or PowerMyMac.
Step 3: Locate Android Studio
Find Android Studio in the list of apps and select it.
Step 4: Click Uninstall
Click the Uninstall button to remove Android Studio and its associated files.
Using an uninstaller tool ensures all related files and folders are deleted, leaving no remnants behind.
Additional Tips
- Backup Important Data: Ensure any important project data or settings are backed up before uninstalling.
- Check for Dependencies: Update or remove other applications that depend on Android Studio.
- Reinstall if Needed: Follow Google's installation instructions if you need to reinstall Android Studio in the future.
By following this comprehensive guide, you can confidently uninstall Android Studio from your Mac, ensuring a clean and efficient system.