
Introduction
Android Studio serves as the official Integrated Development Environment (IDE) for Android app development. It offers native integration with Git and GitHub, simplifying the management and tracking of project files. This integration facilitates collaboration among developers and helps maintain an organized codebase. This article covers integrating Git into Android Studio, using basic Git commands, and managing projects on GitHub.
Why Use Git?
Git is a free, open-source, distributed version control system. It allows developers to manage and track changes in programming files. Key benefits include:
- Collaboration: Multiple developers can work on the same codebase simultaneously.
- Branching: Create branches to isolate different features or bug fixes.
- Commit Messages: Add detailed messages to commits.
- Remote Repositories: Push or pull changes from a remote repository.
Installing Git
To integrate Git with Android Studio, first install Git on your computer. Follow these steps:
- Download Git: Visit the Git download page and select the appropriate version for your operating system.
- Run the Installer: Follow the prompts during installation. Ensure the installation path is correctly set up.
- Verify Installation: Open a terminal or command prompt and type
git --versionto confirm Git is installed.
Setting Up Git in Android Studio
Once Git is installed, set it up in Android Studio:
- Open Android Studio: Launch the IDE and open your project.
- Enable Version Control Integration: Navigate to
File>Settings>Version Control. - Select Git: Choose
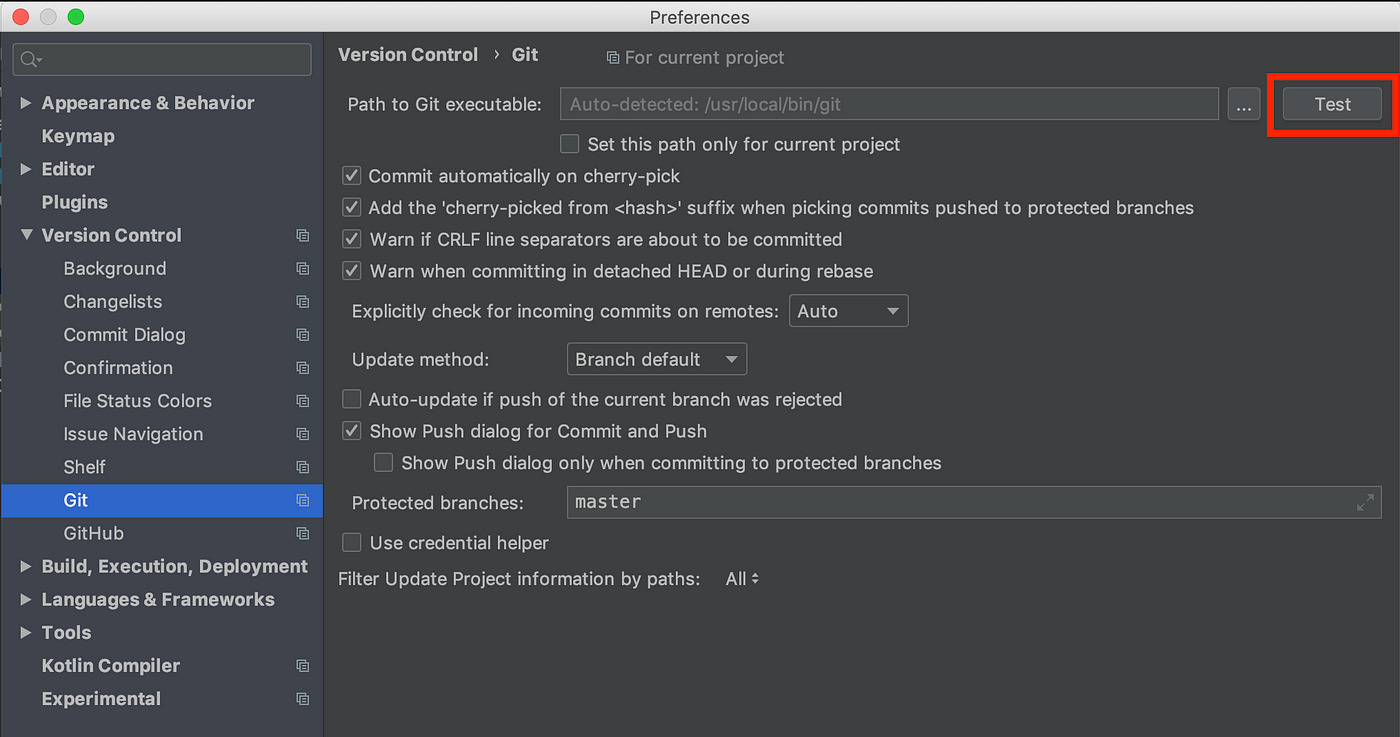
Gitfrom the list and clickOk. - Test Git Configuration: Go to
Android Studio>Preferences>Version Control>Git. ClickTestto verify the Git executable path.
Creating a New Repository
Before using Git with your Android project, create a new repository locally or on a remote service like GitHub.
Create a Local Repository
- Open a terminal or command prompt and navigate to your project directory.
- Run
git initto initialize a new Git repository. - Stage all files with
git add .. - Commit these files using
git commit -m "Initial commit". - Link your local repository to a remote one with
git remote add origin <repository-url>.
Create a Remote Repository on GitHub
- Go to GitHub and create a new repository.
- Copy the repository URL.
- In your terminal or command prompt, run
git remote add origin <repository-url>.
Integrating Git with Your Android Project
With Git set up and a repository created, integrate it with your Android project:
- Open Your Project in Android Studio: Launch the IDE and open your Android project.
- Enable Version Control Integration: Navigate to
File>Settings>Version Control. SelectGitand clickOk. - Initialize Git Repository: Click on
VCS>Enable Version Control Integrationif not already initialized. - Stage and Commit Changes: Right-click on the project folder, select
Git>Add. Then, right-click again, selectGit>Commit, enter a commit message, and clickCommit. - Push Changes to Remote Repository: Go to
Git>Push, define the remote repository URL, and clickOk.
Basic Git Commands
Familiarize yourself with these essential Git commands:
- git init: Initializes a new Git repository.
- git add
: Stages a file for the next commit. - git add .: Stages all files in the current directory.
- git commit -m "
" : Commits staged files with a specified message. - git remote add origin
: Links your local repository to a remote one. - git push -u origin master: Pushes local changes to the remote repository and sets up tracking information.
- git pull: Fetches changes from the remote repository and merges them into your local branch.
- git branch
: Creates a new branch. - git checkout
: Switches to a different branch. - git merge
: Merges changes from one branch into another. - git log: Displays commit history.
- git status: Shows the status of your repository, including staged and unstaged changes.
Managing Branches
Branches allow work on different features or bug fixes without affecting the main codebase. Manage branches with these steps:
- Create a New Branch: Run
git branch <branch-name>to create a new branch. Switch to it withgit checkout <branch-name>. - Merge Branches: Run
git merge <branch-name>to merge changes from one branch into another. - Delete a Branch: Run
git branch -d <branch-name>to delete a branch.
Showing Log History
Use the git log command to display a list of all commits made in your repository, including commit hashes, author names, and timestamps.
Rolling Back Changes
To roll back changes, use the git reset command:
- Reset to a Specific Commit: Run
git reset --hard <commit-hash>to reset your repository to a specific commit. - Reset to the Previous Commit: Run
git reset --hard HEAD~1to reset your repository to the previous commit.
Annotating Commits
Annotate commits to understand changes made in each commit:
- Annotate a Commit: Run
git annotate <file>to display annotations for each line in the specified file.
Ignoring Files
Ignore certain files generated by Android Studio or other tools by creating a .gitignore file in the root directory of your project. Add paths to files or directories to ignore.
Example .gitignore file content:
*.iml
.gradle
/local.properties
/.idea/workspace.xml
/.idea/libraries
.idea
.DS_Store
/build
/captures
.externalNativeBuild
Additional Tips
- Use Command Line: While Android Studio offers a user-friendly interface, the command line can be more efficient and flexible. Familiarize yourself with basic Git commands.
- Collaborate Effectively: Use branches to isolate different features or bug fixes, allowing multiple developers to work on the same project without conflicts.
- Document Changes: Use detailed commit messages to document changes, aiding in understanding your codebase's evolution.
- Regularly Push Changes: Regularly push changes to the remote repository to ensure synchronization across all team members.
Mastering these techniques will streamline your development process and help deliver high-quality Android applications efficiently.