
Introduction
Renaming the package name in an Android application is a common task developers encounter, especially when rebranding an app or working with codebases that have different naming conventions. This guide will walk you through the step-by-step process of renaming the package name in Android Studio, ensuring all references to the old package are updated correctly.
Why Rename a Package?
Understanding the reasons for renaming a package can help clarify its importance. Here are a few scenarios:
- Rebranding: Reflect a new brand identity by changing the package name.
- Codebase Management: Avoid conflicts or better organize code when working with different sources.
- Development Environment: Use a different package name for better organization or to avoid naming conflicts with other projects.
Prerequisites
Before starting the renaming process, ensure you have the following:
- Android Studio Installed: The latest version should be on your machine.
- Project Opened: Open your Android project in Android Studio.
- Gradle Files: Ensure your Gradle files are up-to-date and synchronized with your project.
Step-by-Step Guide
Step 1: Uncheck Compact Middle Packages
The first step involves unchecking the "Compact Middle Packages" option. This option, usually enabled by default, can make renaming packages individually difficult. To uncheck it:
- Click on the settings gear icon in the top-right corner of the Android Studio window.
- Navigate to
Appearance & Behavior>Appearance. - Uncheck the box next to
Compact Middle Packages.
This will allow you to see and manage each directory individually, making it easier to rename packages.
Step 2: Identify the Package to Rename
Identify the package you want to rename. This could be something like com.example.myapp or any other unique identifier for your application.
Step 3: Right-Click and Refactor
Right-click on the package you want to rename and select Refactor > Rename. This will open a dialog box where you can enter the new name for your package.
Step 4: Rename the Package
Enter the new name for your package in the dialog box. For example, if you want to change com.example.myapp to com.newcompany.myapp, enter com.newcompany.myapp in the dialog box. Click on Rename to apply the changes.
Step 5: Update All References
After renaming the package, Android Studio will automatically update all references to the old package name. However, it's good practice to manually check for any remaining references:
- Activities and Layouts: Open each activity and layout file to ensure the package name has been updated correctly.
- Java/Kotlin Files: Check all Java or Kotlin files that use classes from the renamed package.
- Gradle Files: Ensure the
applicationIdin yourbuild.gradlefile is updated to reflect the new package name.
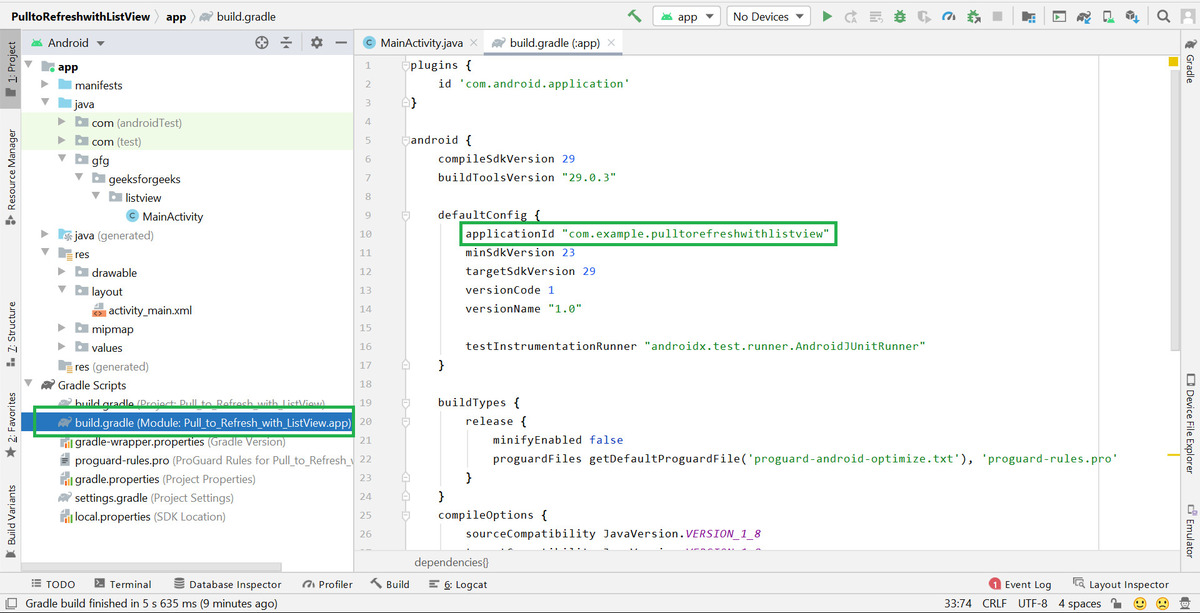
Step 6: Update Build.gradle
Open your build.gradle file (Module: app) and update the applicationId to match the new package name. For example, if you changed com.example.myapp to com.newcompany.myapp, update the applicationId accordingly:
gradle
android {
…
defaultConfig {
applicationId "com.newcompany.myapp"
…
}
}
After making these changes, click on Sync Now to ensure your project is updated correctly.
Step 7: Rebuild the Project
To ensure all changes are reflected in your project, go to Build > Rebuild Project. This will rebuild your project with the new package name and update any remaining references.
Additional Tips
Handling Errors
If errors occur after renaming the package, such as unresolved references or missing classes, it's likely because some files still reference the old package name. To resolve these issues:
- Search and Replace: Use the
Find>Replace in Pathfeature to search for occurrences of the old package name and replace them with the new one. - Gradle Sync: Ensure your Gradle files are synchronized with your project by clicking on
Sync Nowin the Gradle tool window.
Renaming Directory Structure
If renaming the entire directory structure is necessary (e.g., from com.example.myapp to com.newcompany.myapp), follow these steps:
- Rename Directories: Right-click on each directory and select
Refactor>Rename. Repeat this process for all directories in your project. - Update Build.gradle: After renaming all directories, update the
applicationIdin yourbuild.gradlefile to match the new package name.
Compact Middle Packages Option
If issues arise with the Compact Middle Packages option, unchecking it is recommended. This option can sometimes cause problems when trying to rename packages individually.
Renaming a package in Android Studio involves unchecking the Compact Middle Packages option, right-clicking on the package, selecting Refactor > Rename, and updating all references to the new package name. Additionally, ensuring your build.gradle file is updated with the new applicationId and rebuilding the project will help avoid any potential errors. By following these steps, you can efficiently rename your package and keep your project organized.