Portable Android Emulator: Your Complete Guide

Android Emulator
portable-android-emulator-your-complete-guide
Source: Lifewire.com

Introduction to Portable Android Emulators

What is a Portable Android Emulator?

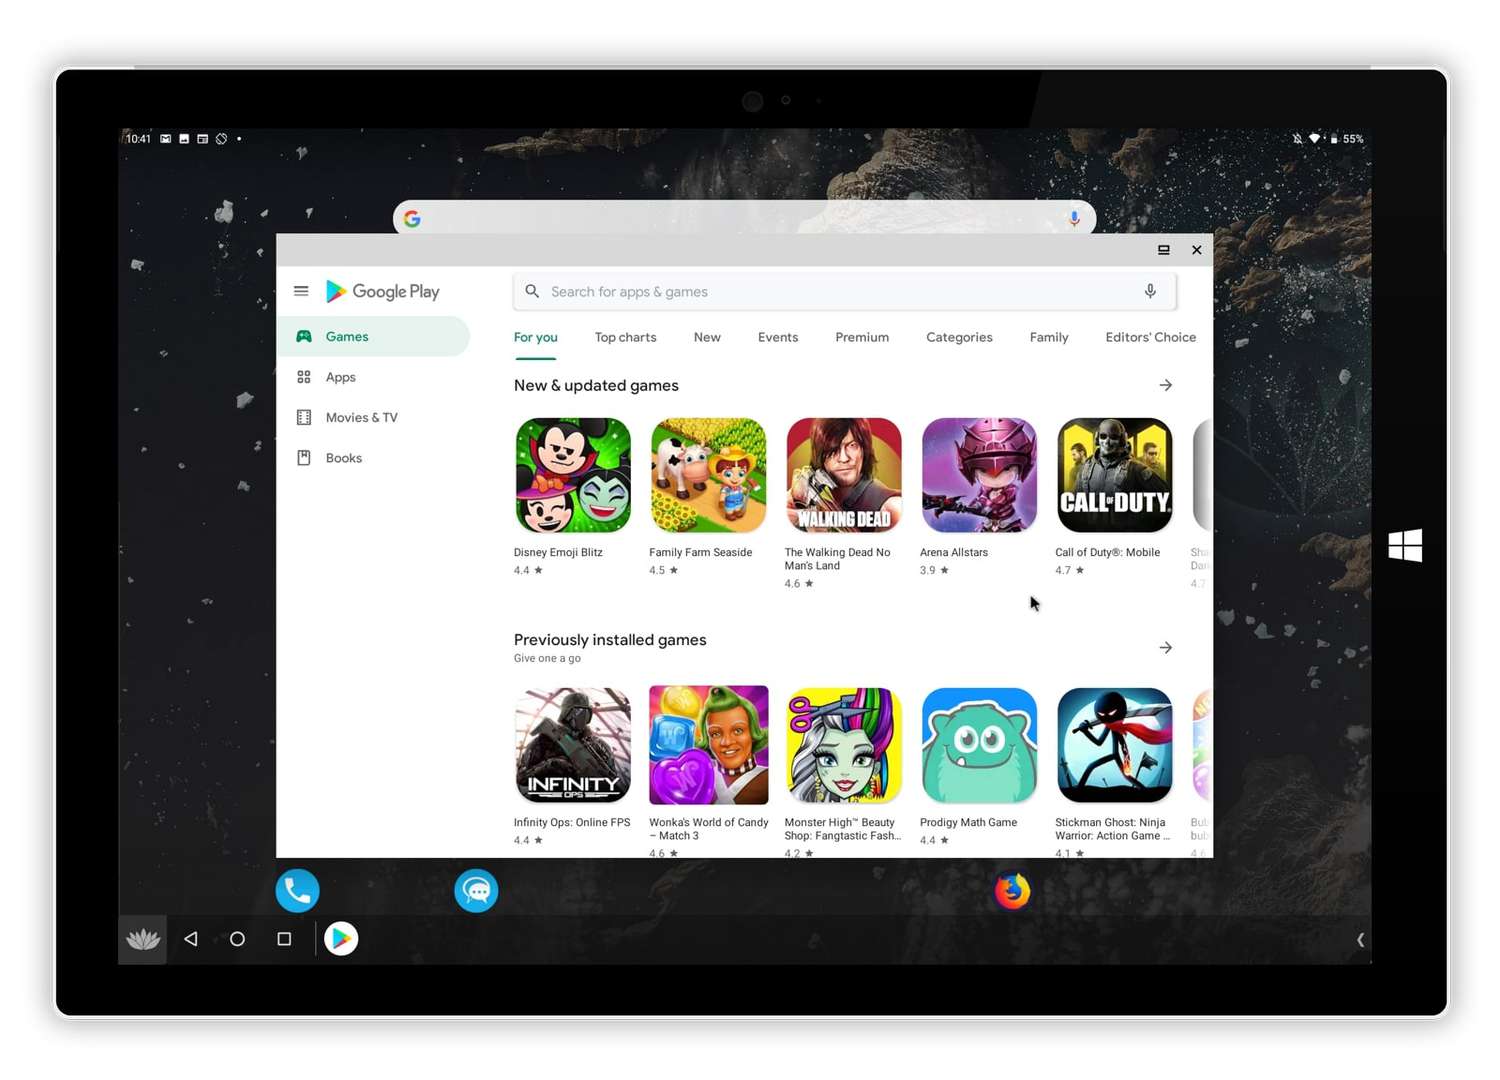
A portable Android emulator is software that mimics the Android operating system on a different device, like a PC or Mac. Unlike regular emulators, portable ones don’t need installation. You can run them from a USB drive or any external storage. This makes them super handy for testing apps, playing mobile games, or just exploring Android without needing an actual Android device.

Why Use a Portable Android Emulator?

Using a portable Android emulator offers several perks. First, it’s convenient. You can carry it around on a USB stick and use it on any compatible computer. This is great for developers who need to test their apps on the go. Gamers also benefit because they can play mobile games on a bigger screen with better controls. Plus, it’s a safe way to try out apps without risking your phone’s security.

Key Takeaways:

  • Portable Android emulators let you run Android apps and games on your computer without installing anything, making it super easy to carry and use on any PC or Mac.
  • These emulators are perfect for developers to test apps and for gamers to enjoy mobile games on a bigger screen with better controls.

Setting Up Your Portable Android Emulator

System Requirements

Before diving in, check your computer’s specs. For a smooth experience, your system should meet these requirements:

  • Minimum Requirements:

    • OS: Windows 7/8/10 or macOS
    • RAM: 4GB
    • Storage: 5GB free space
    • Processor: Intel or AMD dual-core
  • Recommended Requirements:

    • OS: Windows 10 or latest macOS
    • RAM: 8GB or more
    • Storage: 10GB free space
    • Processor: Intel i5 or better, AMD Ryzen

Installation Guide

Ready to set up your portable Android emulator? Follow these steps:

  1. Download the Emulator: Visit the official website of the emulator you want to use. Popular choices include BlueStacks, Genymotion, and Android Studio Emulator.
  2. Extract the Files: Once downloaded, extract the files to your USB drive or any external storage.
  3. Run the Emulator: Navigate to the extracted folder and find the executable file (usually ends in .exe for Windows or .dmg for macOS). Double-click to run it.
  4. Configure Settings: Follow the on-screen instructions to set up the emulator. You might need to sign in with a Google account to access the Play Store.
  5. Install Apps: Once the emulator is running, you can download and install apps just like on a real Android device.

That’s it! You’re now ready to use your portable Android emulator wherever you go.

Popular Portable Android Emulators

BlueStacks

BlueStacks is one of the most popular Android emulators, especially among gamers. It allows users to run Android apps and games on their PC or Mac with ease. One of its standout features is its ability to run multiple instances, meaning you can play several games or use different apps simultaneously. Additionally, BlueStacks offers a user-friendly interface and supports high-definition graphics, making it a go-to choice for those looking to enjoy mobile games on a larger screen.

Genymotion

Genymotion is another well-regarded Android emulator, particularly favored by developers. It provides a wide range of features that make app testing and development more efficient. Genymotion supports various Android versions and device configurations, allowing developers to test their apps on different virtual devices. It also integrates seamlessly with Android Studio and other development tools, offering features like GPS simulation, battery level simulation, and more. This flexibility makes Genymotion a powerful tool for both novice and experienced developers.

Android Studio Emulator

The Android Studio Emulator is the official emulator provided by Google. It's designed primarily for developers and offers a robust set of features for app testing and development. This emulator supports the latest Android versions and provides a highly customizable environment. Developers can simulate different network conditions, test various screen sizes, and even emulate hardware sensors. While it may not be as user-friendly as BlueStacks for gaming, its comprehensive feature set makes it an indispensable tool for serious app development.

Automating Mobile Browsers

Automating Chrome in Android Emulators

Automating the Chrome browser within Android emulators can be incredibly useful for testing web applications. Tools like Selenium and Appium allow you to write scripts that automate browser actions, such as clicking buttons, filling out forms, and navigating between pages. To get started, you'll need to install the ChromeDriver, which acts as a bridge between your automation scripts and the Chrome browser in the emulator. Once set up, you can run your scripts to perform automated tests, ensuring your web app functions correctly across different devices and screen sizes.

Other Browsers

While Chrome is the most commonly automated browser, other browsers like Firefox and Opera can also be automated within Android emulators. However, these browsers may have limitations compared to Chrome. For instance, they might not support all the features required for comprehensive automation. Tools like GeckoDriver for Firefox can help bridge some gaps, but you may encounter compatibility issues. Despite these challenges, automating different browsers can provide a more holistic view of how your web app performs across various platforms.

Advanced Features and Customization

Screen Recording and Debugging

Screen recording on emulators like BlueStacks is a handy feature for gamers and developers alike. It lets you capture gameplay or app behavior, making it easier to share or review later. To start recording, look for the screen recording button, usually found in the toolbar. Once you hit record, the emulator captures everything on the screen until you stop it.

Debugging is another crucial feature, especially for developers. Emulators often come with built-in debugging tools that mimic real device behavior. Using Android Studio, you can connect the emulator to your development environment and debug your app just like you would on a physical device. This helps catch bugs early and ensures your app runs smoothly.

Running Emulators Standalone

Running an emulator in a standalone window can make multitasking easier. Instead of having the emulator embedded within another application, you can have it as a separate window. This is particularly useful if you need to switch between multiple tasks or applications.

To run an emulator standalone, you usually need to adjust the settings within the emulator software. Look for options like "Launch in standalone mode" or similar. Once enabled, the emulator will open in its own window, giving you more flexibility in managing your workspace.

Troubleshooting Common Issues

Performance Optimization

Optimizing emulator performance can make a big difference, especially if your system is struggling. Start by allocating more RAM and CPU cores to the emulator. Most emulators have settings where you can adjust these resources.

Another tip is to enable hardware acceleration. This uses your computer's GPU to handle graphics, making the emulator run smoother. Check your emulator's settings for options like "Enable hardware acceleration" or "Use host GPU."

Common Errors and Fixes

Encountering errors is pretty common, but most have straightforward fixes. If your emulator won't start, try restarting your computer or reinstalling the emulator. Sometimes, updates can cause compatibility issues, so make sure both your emulator and system are up-to-date.

Another frequent issue is network connectivity. If the emulator can't connect to the internet, check your firewall settings. Ensure the emulator has the necessary permissions to access the network. If all else fails, a quick search online often reveals solutions from others who've faced the same problem.

Use Cases and Applications

Gaming

Portable Android emulators can seriously amp up your mobile gaming experience on a PC. They offer better controls, thanks to keyboard and mouse support, and often provide enhanced graphics. Games that might lag on a phone can run smoothly on a well-optimized emulator.

Plus, many emulators come with built-in features like multi-instance, allowing you to play multiple games simultaneously. This is a game-changer for those who enjoy managing several accounts or playing different games at once.

Development and Testing

For developers, portable Android emulators are invaluable tools. They let you test apps in various environments without needing multiple physical devices. You can simulate different screen sizes, resolutions, and Android versions, ensuring your app works across the board.

Emulators also support automated testing. You can write scripts to run tests, saving time and catching issues early. This makes the development process more efficient and helps deliver a polished final product.

Final Thoughts on Portable Android Emulators

Portable Android emulators are pretty nifty tools, offering both developers and gamers a bunch of benefits. Developers can test apps across various devices and environments without needing a stack of actual phones, making their work more efficient. Gamers get to enjoy their favorite mobile games on larger screens with better controls, enhancing their overall experience. These emulators also provide a safer way to explore Android apps without risking your own device. Whether you're testing, gaming, or just curious about Android, these emulators make it easy to carry your Android experience on the go.

Understanding Portable Android Emulators

The Portable Android Emulator lets users run Android apps on their computer without installing a full Android OS. It mimics a smartphone or tablet environment, allowing access to the Google Play Store, testing apps, and playing mobile games. Key functionalities include customizable controls, multi-instance support, and seamless integration with Windows or macOS. This tool is perfect for developers needing to test apps across different devices or gamers wanting to play mobile games on a larger screen.

What You Need and Compatibility

To ensure your device supports the portable Android emulator, check these requirements and compatibility details:

  1. Operating System: Your device should run on Windows 7/8/10 or macOS 10.12 and above.
  2. Processor: A 64-bit CPU is necessary. Intel or AMD processors with Virtualization Technology (VT-x or AMD-V) enabled are recommended.
  3. RAM: At least 4GB of RAM is required, but 8GB or more is ideal for smoother performance.
  4. Storage: Ensure you have at least 10GB of free disk space. SSDs are preferable for faster load times.
  5. Graphics: A GPU with OpenGL 2.0 support is needed. For better graphics performance, a dedicated graphics card like NVIDIA or AMD is beneficial.
  6. Internet Connection: A stable internet connection is required for downloading the emulator and any necessary updates.
  7. USB Ports: If you plan to connect external devices, ensure you have available USB ports.
  8. Screen Resolution: A minimum resolution of 1280x800 is recommended for optimal display.

Check these specs on your device to confirm compatibility. If your device meets these criteria, you’re good to go!

How to Set Up Your Emulator

  1. Download the Android Emulator APK from a trusted source.
  2. Transfer the APK file to your handheld device.
  3. Open your device's settings.
  4. Navigate to "Security" or "Privacy."
  5. Enable "Unknown Sources" to allow installation of apps from sources other than the Play Store.
  6. Locate the transferred APK file using a file manager app.
  7. Tap on the APK file to begin installation.
  8. Follow the on-screen prompts to complete the installation.
  9. Launch the emulator app from your app drawer.
  10. Sign in with your Google account to access the Play Store.
  11. Download and install any Android apps you want to use within the emulator.

Enjoy your portable Android emulator!

Tips for Effective Use

Gaming on the Go: Use a Bluetooth controller for a smoother experience. Adjust graphics settings to balance performance and battery life.

App Development: Test apps in different screen resolutions to ensure compatibility. Utilize keyboard shortcuts to speed up coding and debugging.

Productivity: Sync your Google account for seamless access to emails, documents, and calendar events. Customize the home screen with widgets for quick access to essential tools.

Entertainment: Download apps like Netflix or Spotify for offline access. Use headphones to enhance audio quality and avoid disturbing others.

Travel: Preload maps and navigation apps to avoid data charges. Keep a portable charger handy to ensure your device stays powered.

Security: Enable two-factor authentication for added protection. Regularly update apps and the emulator to the latest versions for security patches.

Customization: Explore different launchers to personalize the interface. Use themes and icon packs to match your style.

Multitasking: Take advantage of split-screen mode to run two apps simultaneously. Use gesture controls for quicker navigation.

Backup: Regularly back up your data to cloud storage to prevent loss. Use backup apps to save app settings and progress.

Performance: Clear the cache periodically to free up space. Monitor battery usage to identify and manage power-hungry apps.

Troubleshooting Common Problems

Battery drains quickly: Lower screen brightness, close unused apps, and turn off Wi-Fi or Bluetooth when not needed.

Device overheating: Avoid using while charging, close background apps, and keep it out of direct sunlight.

Slow performance: Clear cache, uninstall unused apps, and restart the device regularly.

App crashes: Update the app, clear its cache, or reinstall it.

Connectivity issues: Toggle airplane mode on and off, restart the device, and forget then reconnect to the Wi-Fi network.

Screen freezes: Force restart by holding the power button and volume down button simultaneously.

Storage full: Delete unnecessary files, move photos to cloud storage, and uninstall unused apps.

Unresponsive touchscreen: Clean the screen, remove screen protectors, and restart the device.

Bluetooth not pairing: Turn Bluetooth off and on, restart both devices, and ensure they are within range.

Camera not working: Restart the device, clear the camera app cache, and check for software updates.

Keeping Your Emulator Secure

Using a portable Android emulator involves handling sensitive data. To keep your information safe, always download emulators from trusted sources. Avoid third-party apps that might contain malware. Regularly update your emulator to patch any security vulnerabilities.

Enable encryption on your device to protect stored data. Use strong passwords and two-factor authentication for added security. Be cautious with permissions; only grant access to necessary features.

For privacy, avoid logging into personal accounts on the emulator. Use virtual private networks (VPNs) to mask your IP address. Clear cache and cookies regularly to remove tracking data.

By following these tips, you can enjoy a safer and more private experience with your portable Android emulator.

Comparing Other Options

Pros of Portable Android Emulators:

  • Flexibility: Run Android apps on various devices.
  • Testing: Great for app developers to test their apps.
  • Convenience: Access Android features without an Android device.

Cons of Portable Android Emulators:

  • Performance: May lag on older computers.
  • Compatibility: Not all apps run smoothly.
  • Resource-Intensive: Requires significant system resources.

Alternatives:

  • BlueStacks: Popular for gaming, user-friendly.
  • NoxPlayer: Good for gaming, customizable controls.
  • Genymotion: Cloud-based, great for developers.
  • MEmu: Supports multiple instances, good for multitasking.
  • LDPlayer: Optimized for gaming, lightweight.

Battery drains quickly: Lower screen brightness, close unused apps, and turn off Wi-Fi or Bluetooth when not needed.

Device overheating: Avoid using while charging, close background apps, and keep it out of direct sunlight.

Slow performance: Clear cache, uninstall unused apps, and restart the device regularly.

App crashes: Update the app, clear its cache, or reinstall it.

Connectivity issues: Toggle airplane mode on and off, restart the device, and forget then reconnect to the Wi-Fi network.

Screen freezes: Force restart by holding the power button and volume down button simultaneously.

Storage full: Delete unnecessary files, move photos to cloud storage, and uninstall unused apps.

Unresponsive touchscreen: Clean the screen, remove screen protectors, and restart the device.

Bluetooth not pairing: Turn Bluetooth off and on, restart both devices, and ensure they are within range.

Camera not working: Restart the device, clear the camera app cache, and check for software updates.

Portable Android Emulators: The Bottom Line

Portable Android emulators offer a handy way to run Android apps on your PC without installing anything. They’re great for gamers, developers, or anyone wanting to use mobile apps on a bigger screen. These emulators are easy to use, often requiring just a USB stick to get started. They support various Android versions and can run most apps smoothly. However, performance might vary based on your PC’s specs. Always ensure your system meets the emulator’s requirements for the best experience. While there are many options out there, some popular ones include BlueStacks, Nox, and MEmu. Each has its own features, so pick one that fits your needs. Portable emulators are a convenient solution for accessing Android apps on the go, making them a valuable tool in today’s tech-savvy world.

What mobile browser can you automate in the Android emulator?

Currently, the only browser you can automate in Android Emulators is the stock browser, which is Chrome.

What is the best emulator for Android to play PC games?

BlueStacks is a top pick for gaming. It's easy to set up, use, and comes with features like screen recording and debugging. BlueStacks is the oldest and most popular Android emulator in the mobile gaming market.

How do you run an Android emulator standalone?

To launch the emulator in a separate window, go to File > Settings > Tools > Emulator (Android Studio > Preferences > Tools > Emulator on macOS) and deselect Launch in a tool window.

Can you use an Android emulator without installing Android Studio?

Yes, you can use standalone emulators like BlueStacks, Nox, or Genymotion without needing Android Studio.

Is it possible to run multiple Android emulators at the same time?

Yes, you can run multiple instances of Android emulators simultaneously, but it may require a powerful computer to handle the load.

Are Android emulators safe to use?

Most Android emulators are safe, but always download from official websites to avoid malware. Popular options like BlueStacks and Nox are generally considered secure.

Can you use an Android emulator on a Mac?

Yes, many Android emulators like BlueStacks and Genymotion are compatible with macOS.

Was this page helpful?