
Using Official Apple Tools: Move to iOS
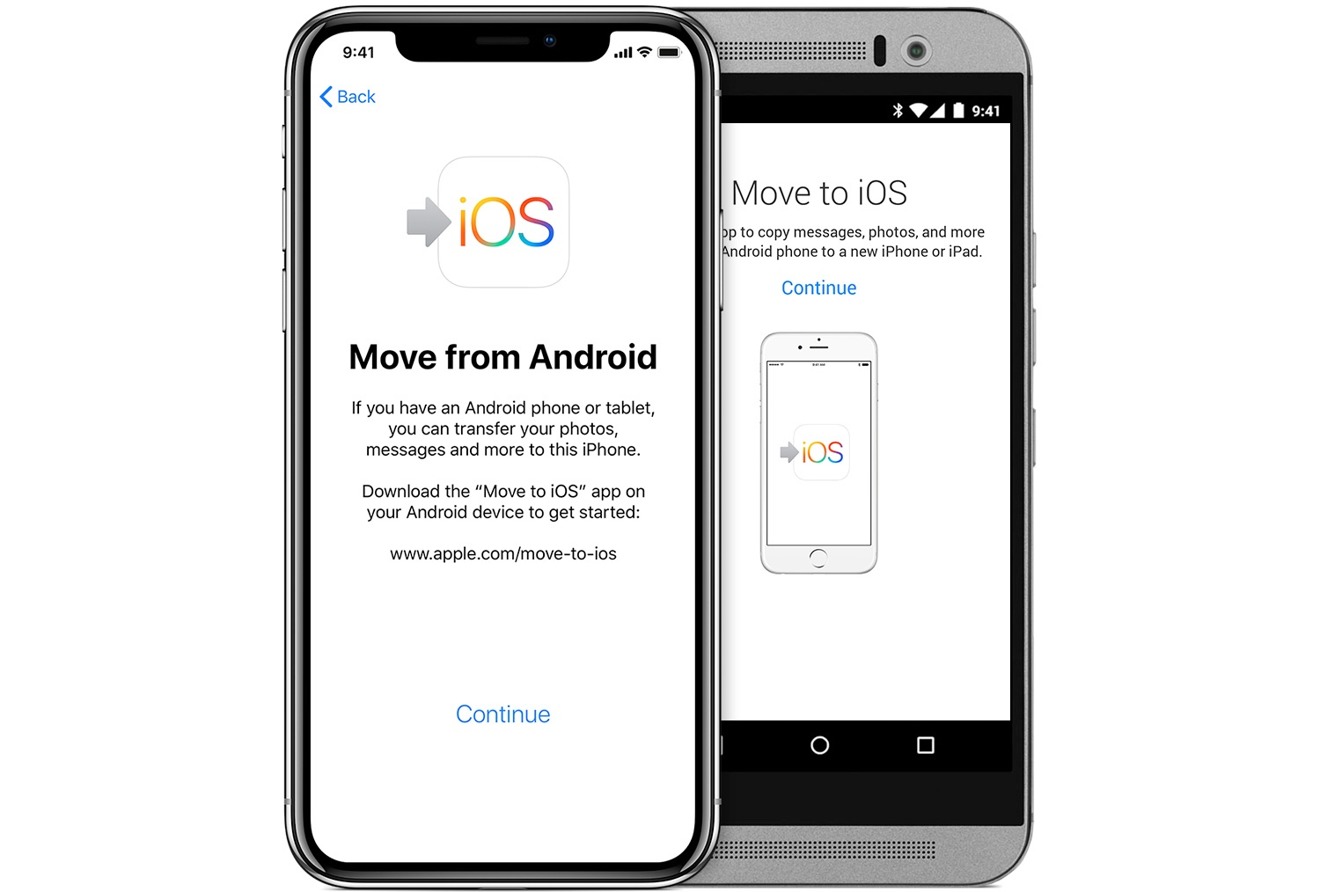
One of the most convenient ways to transfer photos from an Android device to an iPhone is by using the Move to iOS app. This app, designed by Apple, helps users migrate their data, including photos, from an Android device to an iPhone.
Step-by-Step Guide to Using Move to iOS
-
Download the Move to iOS App
- On your Android device, go to the Google Play Store and download the Move to iOS app.
- On your iPhone, navigate to the "Apps & Data" option and select the "Move Data from Android" icon.
-
Launch the Move to iOS App on Both Devices
- Launch the Move to iOS app on both your Android and iPhone devices.
- On your iPhone, you will see a 12-digit code displayed on the screen. This code is required for the transfer process.
-
Enter the 12-Digit Code on Your Android Device
- On your Android device, open the Move to iOS app and enter the 12-digit code displayed on your iPhone.
- The app will then scan for available data on your Android device, including photos.
-
Select Photos for Transfer
- Once the app has detected your Android device, you will be prompted to select the data you want to transfer, including photos.
- Choose the photos you want to transfer and follow the on-screen instructions.
-
Wait for the Transfer Process to Complete
- The transfer process may take a few minutes, depending on the number of photos you are transferring.
- Once the transfer is complete, you will see a confirmation message on both devices.
Using Third-Party Apps: Send Anywhere
Another efficient method for transferring photos from an Android device to an iPhone is by using third-party apps like Send Anywhere. This app allows you to share data between Android and iOS devices quickly and easily.
Step-by-Step Guide to Using Send Anywhere
-
Download Send Anywhere on Both Devices
- Download the Send Anywhere app on both your Android and iPhone devices from their respective app stores.
-
Select Photos on Your Android Device
- Open the Photos app on your Android device and select the photos you want to transfer.
- Send Anywhere will generate a QR code or a 6-digit code that you can use to receive the photos on your iPhone.
-
Scan the QR Code or Enter the 6-Digit Code on Your iPhone
- On your iPhone, open the Send Anywhere app and select the "Receive" option.
- Scan the QR code displayed on your Android device or enter the 6-digit code to start receiving photos.
-
Wait for the Transfer Process to Complete
- The transfer process should begin immediately after scanning or entering the code.
- Once the transfer is complete, you can find the received photos in your iPhone's Photos app.
Using Third-Party Apps: SHAREit
SHAREit is another popular third-party app that allows you to transfer photos from an Android device to an iPhone. It supports the transfer of various file types, including photos, videos, and documents.
Step-by-Step Guide to Using SHAREit
-
Download SHAREit on Both Devices
- Download the SHAREit app on both your Android and iPhone devices from their respective app stores.
-
Launch SHAREit on Both Devices
- Launch the SHAREit app on both devices.
-
Select Photos on Your Android Device
- On your Android device, tap the "Send" icon and select the photos you want to transfer.
- When the screen turns blue, select "Connect to iOS/WP" and follow the on-screen instructions.
-
Connect Your iPhone to the Hotspot
- On your iPhone, turn on the Hotspot option and connect to the network displayed on your Android device.
- Launch SHAREit on your iPhone and tap the "Receive" option.
-
Wait for the Transfer Process to Complete
- The transfer process should begin immediately after connecting to the hotspot.
- Once the transfer is complete, you can find the received photos in your iPhone's Photos app.
Using Cloud Services: Google Photos
Using cloud services like Google Photos is another efficient method for transferring photos from an Android device to an iPhone. Google Photos allows you to store and access your photos from any device with an internet connection.
Step-by-Step Guide to Using Google Photos
-
Set Up Google Photos on Your Android Device
- Ensure that Google Photos is set up on your Android device and that your photos are synced to the cloud.
-
Access Google Photos on Your iPhone
- Download and install the Google Photos app on your iPhone from the App Store.
- Log in to the same Google account used on your Android device.
-
Download Photos from Google Photos
- Once logged in, refresh the Google Photos app on your iPhone to ensure all synced photos are visible.
- Select the photos you want to download and click on the three dots in the top right corner.
- Choose "Download" to transfer the selected photos to your iPhone.
Using Cloud Services: Dropbox
Another cloud storage service that can be used for transferring photos is Dropbox. This service allows you to store and share files across devices.
Step-by-Step Guide to Using Dropbox
-
Set Up Dropbox on Your Android Device
- Ensure that Dropbox is set up on your Android device and that your photos are synced to the cloud.
-
Access Dropbox on Your iPhone
- Download and install the Dropbox app on your iPhone from the App Store.
- Log in to the same Dropbox account used on your Android device.
-
Download Photos from Dropbox
- Once logged in, navigate to the folder containing your synced photos.
- Select the photos you want to download and tap on the "+" icon to add them to your iPhone.
Using Email
Transferring photos via email is a more traditional method that can be useful if you need to transfer a small number of photos or if you prefer a manual approach.
Step-by-Step Guide to Using Email
-
Compose an Email on Your Android Device
- Open the Email app on your Android device and compose a new message.
- Address the email to yourself and attach the photos you want to transfer.
-
Send the Email
- Send the email to yourself, ensuring that the photos are attached.
-
Download Photos on Your iPhone
- Open the Email app on your iPhone and find the email containing the attached photos.
- Download the attached photos to your iPhone.
Using Syncios Data Transfer
Syncios Data Transfer is a powerful tool that allows you to transfer data between Android and iOS devices, including photos. It supports a wide range of file types and offers a user-friendly interface.
Step-by-Step Guide to Using Syncios Data Transfer
-
Connect Both Devices to Your Computer
- Connect both your Android and iPhone devices to your computer via USB cables.
-
Launch Syncios Data Transfer
- Download and install Syncios Data Transfer on your computer.
- Launch the software and select the "Transfer" button in the main interface.
-
Detect Devices and Select Photos
- The software will automatically detect both devices and display them in the starting window.
- Mark the photos you want to transfer, including both Camera Roll and Photo Library on your Android device.
-
Start the Transfer Process
- Click the "Next" button to start the transfer process. Ensure that neither device is disconnected during this time.
- The data transfer process may take a while depending on the size of the photos.
-
Verify Transfer Completion
- Once the transfer is complete, you will receive a "Copy Completed" prompt. Click OK to close the window and verify that the photos have been transferred successfully.
Transferring photos from an Android device to an iPhone can be done using various methods, each with its own advantages. The Move to iOS app offers a seamless and automated experience, while third-party apps like Send Anywhere and SHAREit provide quick and efficient solutions. Cloud services such as Google Photos and Dropbox allow for easy access to your photos from any device with an internet connection. Additionally, using email or tools like Syncios Data Transfer can also be effective methods depending on your specific needs. By understanding these different approaches, you can choose the method that best fits your requirements and ensure that your valuable photo collection is transferred successfully to your new iPhone.