
Introduction
Localizing an Android application helps reach a broader audience and improve user experience. One powerful tool in Android Studio for managing translations is the Translation Editor. This guide will walk you through using the Translation Editor to localize your app, from setting up the environment to testing and maintaining translations.
Setting Up Your Environment
Understanding the basic structure of string resources in Android applications is essential before diving into the Translation Editor. String resources are stored in the strings.xml file, located in the res/values directory of your project. This file contains key-value pairs where the key is a unique identifier for the string, and the value is the actual text.
Steps to Set Up Your Project
- Open Android Studio: Launch Android Studio and open your project.
- Navigate to Project View: In the left panel, you should see a tree-like structure representing your project. Expand the
resdirectory and then thevaluesdirectory. - Locate strings.xml: Inside the
valuesdirectory, you will find thestrings.xmlfile. This is where you will manage all your string resources.
Accessing the Translation Editor
The Translation Editor provides a consolidated and editable view of all your default and translated string resources.
How to Access the Translation Editor
- Open Project View: Ensure that you are in the Project view by clicking on the Project tab in the left panel.
- Navigate to Android View: In the Project view, navigate to
Android > Module Name > res > values. - Right-Click on strings.xml: Right-click on the
strings.xmlfile and selectOpen Translations Editor.
Alternatively, access the Translation Editor from within any of your strings.xml files:
- Open strings.xml: Double-click on the
strings.xmlfile to open it for editing. - Click Open Editor Link: In the upper-right corner of the
strings.xmlfile, click theOpen editorlink.
If the link is not visible, close and reopen your project to bring it back.
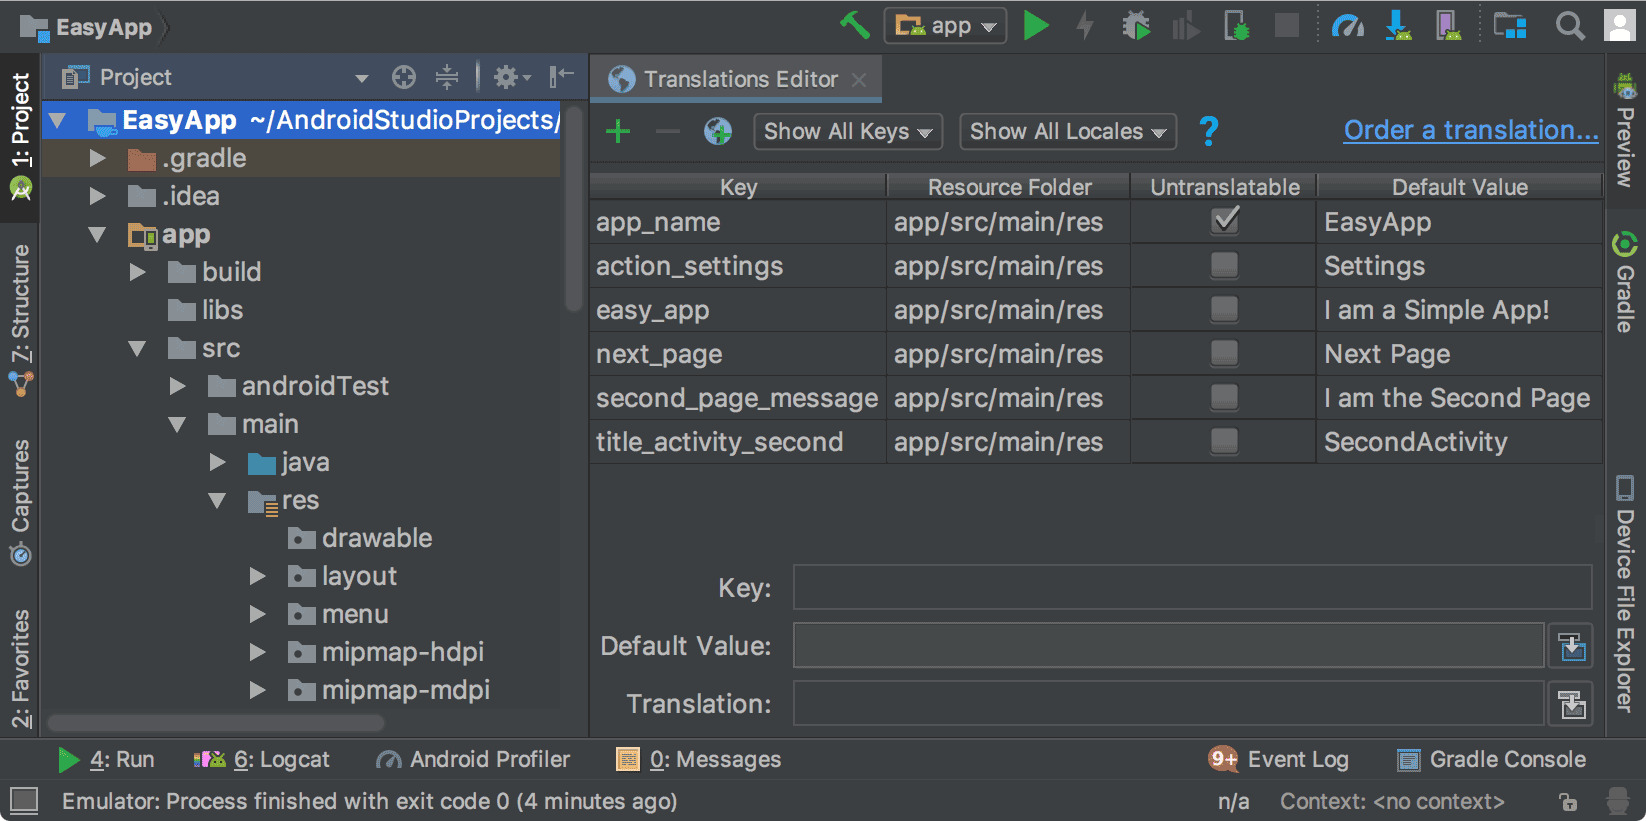
Understanding the Translation Editor Interface
Once you open the Translation Editor, you will see a table-like interface with several columns:
- Key: Displays the unique identifier for each string.
- Value: Shows the actual text of the string.
- Untranslatable: Indicates whether a string is translatable or not. If marked as untranslatable, it will not be translated.
- Languages: Displays the languages for which translations are available.
Adding New Languages
To add a new language, follow these steps:
- Select Key: Choose a key from the list.
- Add New Language: Click on the language dropdown menu and select the language you want to add.
- Enter Translation: Enter the translation for the selected key in the chosen language.
The Translation Editor automatically creates appropriate resource directories and strings.xml files for the languages you add.
Editing Translations
To edit an existing translation, follow these steps:
- Select Key: Choose a key from the list.
- Select Language: Choose the language for which you want to edit the translation.
- Modify Value: Modify the value of the selected key in the chosen language.
The Translation Editor updates the underlying strings.xml files with your changes.
Correcting Errors
The Translation Editor helps identify and correct errors in your translations.
- Identify Errors: Look for red text indicating lines that have errors.
- Hover Over Red Text: Hover over the red text to display an explanation of the problem and its resolution.
- Correct Error: Correct the error by deleting or modifying the incorrect translation.
For example, if an app_name row has Untranslatable checked but there is a Spanish translation provided, delete the Spanish translation to correct the error.
Displaying Translated Text in Design Editor
To see how the translated text displays in your app layout, follow these steps:
- Open Layout File: Open your layout file (e.g.,
content_main.xml) by navigating toAndroid > Module Name > res > layout. - Open Design Tab: Click on the Design tab in the lower-left corner to display the Design Editor.
- Select Language: Select the language you want to use from the Language dropdown list.
- Edit Translations: Click on Edit Translations and select the language you want to view your app in.
The Design Editor displays your app layout in the selected language, allowing you to see how the translated text fits into your layout.
Setting Design Editor to Default Language
To set the language back to the default, follow these steps:
- Select Language Dropdown: Click on the Language dropdown list.
- Select Default Language: Select the default language (usually English).
This will set the language back to the default, allowing you to continue working with your original layout.
Managing Translations Efficiently
The Translation Editor provides several features that help manage translations efficiently:
- Automatic Creation of Resource Directories: The Translation Editor automatically creates appropriate resource directories and
strings.xmlfiles for the languages you add. - Real-Time Updates: When you make changes in the Translation Editor, the underlying
strings.xmlfiles update with your changes. - Error Identification and Correction: The Translation Editor helps identify and correct errors in your translations.
Best Practices for Localization
To ensure that your app is well-localized and user-friendly, follow these best practices:
- Avoid Hard-Coded Strings: Avoid placing hard-coded strings in layout files or code. Instead, use string resources to manage all text.
- Use Separate
strings.xmlFiles: Create separatestrings.xmlfiles for different languages and place them in subdirectories named by the respective locales (e.g.,values-esfor Spanish). - Test Thoroughly: Test your app thoroughly in different languages to ensure that all translations are accurate and consistent.
- Maintain Translations Regularly: Regularly update and maintain translations to keep your app relevant and user-friendly.
Advanced Localization Techniques
While the Translation Editor provides a robust solution for managing translations, there are advanced techniques you can use to streamline the localization process:
- Over-the-Air Translation Delivery: Use over-the-air translation delivery to update translated strings without issuing a new application update. This can be achieved using tools like Transifex Native SDK.
- Pluralization Handling: Handle pluralization directly within the user-friendly Transifex web interface to minimize the risk of incorrect translations due to different pluralization rules in each locale.
Localizing an Android application is a critical step in reaching a broader audience and enhancing user experience. The Translation Editor in Android Studio provides a powerful tool for managing translations efficiently. By following the steps outlined in this guide and adhering to best practices for localization, you can ensure that your app is well-localized and user-friendly. Whether you are a beginner or an experienced developer, the Translation Editor is an essential tool that simplifies the process of managing translations in your Android applications.